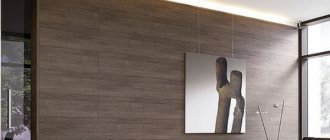
Rack. A simple but surprisingly multifunctional design. In the interior, shelving is used for its intended purpose - open multi-tiered structures with or without sides, the last shelves resting on the ceiling, or low ones, the top panel of which plays the role of a tabletop. They can store books or canned food, children's toys or flower pots on their shelves. Typically, tall shelving is leaned against and secured to the wall. And as shelving structures used for zoning space, when with the help of an original shelving the room is divided into functional zones.
You can assemble the rack yourself, or order it from furniture makers. You can buy a finished product in a furniture showroom, but the price is different in each case. You can also order an exclusive shelving unit from a famous designer. And then it will definitely not look like a boring standard structure that has equipped a basement or garage, as a similar image often slips through when the word “Rack” is mentioned.
The material for creating this kind of structure can be different - wood, plasterboard, metal profile or hollow pipe. Often there are forged racks used for storing wines and installed in cellars. As a rule, such masterpieces are exclusive works of authorship, and not everyone can afford to purchase such luxury.
Simple standard design shelving
Before you begin construction of the structure, you must:
- Decide on the material. Depending on whether the future piece of furniture will be constructed from metal or wood, plasterboard or chipboard, the budget of the event depends.
- Create a drawing of the future structure. The amount of material purchased depends on it.
- Make purchases without losing sight of the acquisition of necessary or missing items and tools for work.
To build a wooden shelf you will need:
- beam;
- slats;
- chipboard or MDF boards;
- plywood;
- screws, self-tapping screws, dowels;
- construction level, preferably laser;
- plumb line, electronic if possible;
- roulette;
- screwdrivers with straight and Phillips blades, but it is best to use a screwdriver;
- chalk or soft lead pencil.
When using chipboard or MDF boards, you must cut them to size in advance. If performing this operation on your own is problematic, you can use the services of specialized stores.
It is important to know that the choice of fastening elements directly depends on the expected loads on the rack structure.
If your rack is a lightweight decorative structure, it can be quickly assembled using self-tapping screws.
Structures attached to concrete walls are fixed using self-tapping screws over 89 mm long. For a brick wall, 52 mm fasteners are suitable. Garage metal shelving, or structures intended for storing books, must be attached with anchors or hung on hooks.
Know that the width of the shelves directly depends on the purpose of the rack and on the products stored on the shelves themselves.
Wooden rack with metal frame
A steel structure for garage shelving is an ideal option. Although it is more expensive, there are advantages, such as high strength, immunity to moisture, mildew and mold, fire resistance and decades of service. But in order to make such a rack a little cheaper and lighter, it is better to make shelves for it from wood.
Preparing materials and tools for assembly
You can make racks for such a garage rack from rectangular pipes or profiles with a width of one side of no more than 5 cm, and for the crossbars use a 30 mm corner.
The frame is made from a corner with the expectation that the thickness of the shelf will be 1.5-3 cm. The crossbars from the corner can be welded to the vertical guides, but it is more rational to bolt them. This option will come in handy if you want to change the height.
Shelves can be made from sheets of chipboard or plywood according to pre-calibrated dimensions, but their width must be at least 1.5 cm - this will ensure strength. In addition, you will need the following tools:
- drill or screwdriver;
- Bulgarian;
- hacksaw;
- corner, level.
Manufacturing technique and assembly of the rack
The system is assembled in free space, and when the frame is ready, it is screwed to the wall. The manufacturing scheme for a metal garage rack looks like this:
- The prepared components for the structure are cut with a grinder in accordance with the measurements taken.
- The vertical placement of shelves is marked on the racks.
- The corners are welded or bolted to the racks, while strictly observing the angles so that the structure does not come out crooked.
- The metal frame is coated with an anti-corrosion compound.
- Shelves are cut from chipboard or plywood, after which it is important to try them on to the finished frame, placing them across.
- The finished shelves are sanded, painted, attached to the metal frame with self-tapping screws, fitting closely to each other.
Video: Master class on building a metal shelving
Selecting material for the rack
The modern market provides tremendous opportunities for choosing materials, of different types, but not inferior to each other, neither in quality, nor in strength, nor in appearance.
Drywall or plastic, wood or metal? What type of material will serve faithfully for a long period of time? What is easier and less labor-intensive to work with? Which material is easier to handle and still have a lot of fun and aesthetic satisfaction in the end?
Plasterboard shelving
Perfectly formatted, bent, cut, but in one plane. However, we should not forget that a sheet of drywall measuring 0.4x0.4 m can sag under its own weight in six months. It is preferable to use plasterboard for wall-mounted decorative shelving.
Photo of a plasterboard shelving unit
Plastic shelving
One of the most durable materials. It does not rot, is not susceptible to harmful insects, but is flammable, difficult to process end cuts and is quite expensive in financial terms.
Plastic shelving photo
Rack made of valuable wood
Shelving made from valuable species is durable. But wooden structures need accurate calculations of the load placed on them, since they can bend greatly under the weight of objects, especially cans of preserves, and, ultimately, the shelves break.
Wooden rack photo
Metal rack
To work with this material, you need skills, specific tools and appropriate equipment.
Metal racks photo
Make a shelving unit with side walls
This is a classic type of design, consisting of shelves mounted on the side walls of the rack. As a rule, there is no back wall, and such racks are made open from the front. The structure is formed on a base that is not always provided with legs and the last shelf practically rests on the ceiling. These are quite strong structures, the stability of which is ensured by fastening systems located at 2/3 of the height of the entire structure. Thanks to the fastenings, the rack is fixed to the wall.
Such racks are quite spacious, since the height of each shelf is calculated taking into account the stored items and are very functional - it is easy and convenient to get any item from an open shelf, even if it is located under the ceiling. The side walls prevent items from falling off the shelves.
The technological process for manufacturing the structure is very simple. The main aspect is measuring the space, as well as carefully calculating the size and height of the shelves.
Important to remember! When installing the rack, it is necessary to make a cut on the lower rear part of the base to fit the baseboard, otherwise the rack will not fit flush against the wall.
The video will tell you in detail how to make a rack with side walls:
Making a wooden rack for the kitchen
The proposed options for kitchen shelving do not always satisfy the wishes of the housewife. Not only the small size of the design, but also the calculation of the space between the shelves does not always correspond to the principles of running a kitchen business. And the financial side of the finished product is much higher than the cost of making a wooden shelving unit for the kitchen with your own hands.
In this matter, the functionality of each shelf of the rack plays a decisive role, and in the interior of the kitchen such a design can become a real find, decorating an empty wall space. These can be racks designed to store, for example, dishes - from decorative plates or utensils to harmonious sets.
The rack can be assembled from chipboard, laminated MDF, edged boards, furniture beads of noble wood. You can use an old cabinet by first removing the back wall and front doors, and installing shelves to create your own masterpiece. And if you make friends with a hair dryer, you can remove the varnish and repaint such a rack to your own taste.
The main feature of kitchen racks, which distinguishes them from the main interior, is considered to be the ability of the structure to emphasize a special style, become a designer find and completely transform the space, especially if the color of the rack is made in contrast to the main color scheme of the interior.
Choosing shelving for large and small kitchens
If the kitchen is small, lightweight structures are more suitable - stainless steel lattice, corner shelving, shelves and cabinets on wheels that can be pulled out, moved and put away.
When choosing a rack, you need to focus on the size of the kitchen
Of course, if the volume of the room allows, there are no restrictions either in the choice of material or in the design. In such cases, massive full-wall shelving looks good, but only if it is neat, well decorated and fits into the overall design. For large kitchens, you can make both stationary large shelving and, in addition to them, mobile cabinets and shelves of the same design.
Choice of color and design
Glass shelving is very fashionable and perfect for modern style kitchens
When making a rack, so that it fits well into the interior, you should take into account the design of the kitchen unit - both in type and color. A buffet-type rack with massive lower cabinets and side walls will fit well into the classic design. You should also consider the color scheme to maintain the overall tone.
In bright kitchen sets using contrasting colors, the shelving can also have a simpler shape, or even be asymmetrical. It can also be painted in contrasting colors, but within the tones that are available in the furniture set. For example, the color of the shelving will go very well in unison with the color of the tabletop, or with the color of the seats of chairs or stools, or a pendant lamp
For a modern, no-frills kitchen design, unobtrusive minimalist designs using metal and glass - natural or organic - that would have a light, flying look are better suited. Such transparent shelving partitions are very fashionable, if the space of the room allows.
Decoration
A well-decorated rack will not only not look handicraft, but will also decorate the kitchen and create a good mood. It is important not to overdo it with decoration, and it should correspond to the general “spirit” of the furniture. A wooden rack can be tinted using stain, left the surface matte or hidden with varnish.
A well-decorated shelving unit will perfectly decorate your kitchen.
You can also “age” surfaces using a metal brush or hard sandpaper, an angle grinder with a special attachment, or using a saw.
Aging your kitchen shelving will give it an antique look.
It gives the impression of an antique wooden surface, which is then cleaned and painted with white glaze and stain. You can burn it with a special device or with a regular burning device. Then the surface is cleaned, hidden with varnish and the design “a la Provence” is obtained.
If the shelving along the wall is large and not too overloaded, the decor of its back wall will look good. You can cover it with wallpaper or fabric with a suitable ornament or other pattern, in tone or contrast with the main colors of the kitchen.
For “cheerful” kitchen furniture, you can paint the surface of the shelving unit in bright colors. You can also paint or burn vintage lettering onto prominent sides and shelves. It’s a good idea to place vases or colored ceramic plates that will both decorate and at the same time distract attention from the contents of the shelves. In short, there is a lot of room for imagination.
DIY rack on the balcony for cans
The simplicity of the robot allows you to create a rack on the balcony for cans with your own hands without extra physical effort. And for a hardworking owner, such work can become a true pleasure. The indescribable delight of the owner at receiving the object for use can especially inspire the accomplishment of this feat.
The most basic stage in the construction of the structure is the accurate measurement and calculation of the shelves for the cans of preserves stored on them. Three, two and one and a half liter jars, not to mention half-liter jars, have different heights, according to which the space between the shelves is created.
As a rule, the largest and heaviest glass jars of canned food are placed on the lower shelves. But they are the least in number, but they take up more space. The width of the shelves is calculated, as a rule, based on two or three three-liter cylinders placed side by side. This will be considered the depth of the future rack. Therefore, as a rule, no more than two shelves are allocated for such canned food. Then three shelves should be allocated for two-liter preparations, up to four shelves - for liter jars, and the largest number of shelves is allocated for half-liter home preparations for the winter.
Wooden shelving for conservation, as a rule, is made with side walls, if they are not installed in a balcony niche. They create structures of this kind using thick plywood, wooden blocks, self-tapping screws and, without fail, fastening corners so that the structure can withstand the weight with which it is planned to load the rack.
Pine wood is preferred as a building material, but other tree species that are highly durable can also be used.
How to make the simplest wooden rack
Most often, garage owners make a wooden rack with their own hands:
- the cost of such a structure is lower than that of a metal one;
- The assembly principle is quick and simple (no need to use welding);
- convenience, aesthetics, naturalness;
- relatively long service life, acceptable strength indicators.
- First of all, choose the material for racks and shelves. Oak or other hardwoods are ideal, but pine can also be used.
- Vertical racks are made of timber with a section of 10x10 cm or 10x5 cm. A smaller beam or board can also be used as crossbars between the shelves.
- The shelves, according to measurements, are cut from a sheet of chipboard. To extend the service life and reduce the risk of board fire, before assembling the structure, it is important to treat all wooden parts with an antiseptic solution.
- Mark the racks vertically and mark the places where the shelves will be attached. The rack is assembled using self-tapping screws, tenons, and wood glue. The best option for attaching shelves to the base are metal corners.
- After assembly, it is important to paint or varnish the product, carefully treating the ends.
To make a DIY wooden rack more stable, it is advisable to attach it to the garage wall with metal brackets.
Video: Simple wooden shelving
DIY wine rack
This is a special type of furniture structure for storing alcohol. Such a rack is a multi-tiered structure created from vertical racks with shelves attached to them, which are responsible for the safety of the wine stored on them, as well as providing appropriate conditions for the full maturation of wines.
In order to create a wine rack with your own hands, you must follow the instructions developed by master winemakers. The best material for the construction of this plan is considered to be wood. The best option is to use solid oak as a base for a wine rack. The strength of wood, praised for centuries, its resistance to decay and the beauty of a truly noble plant leaves the right to claim the main material for creating a wine rack.
Also, ash can be used as a material for construction, as a tree that has more durable wood and a level of moisture resistance than oak. The ash cut is distinguished by its distinctness and special expressiveness of the pattern of growth rings, which is widely used by cabinetmakers when creating the interiors of wine cellars.
DIY wine rack
Designing a wine bottle storage rack involves paying special attention to the depth, width and height of the cabinet. The height should be within reach. When designing a cabinet for the ceiling, the structure must be provided with an appropriate ladder.
The depth of the rack is calculated based on the height of the wine bottles. The depth, as a rule, depends on the method of placement - the stored wine bottles will take an inclined, vertical or horizontal position.
Great difficulty can arise in calculating the width of the rack, which directly depends on the load placed on the shelves.
Remember! Creating short shelves is irrational, but creating long ones is very fraught.
Sagging shelves are a disaster for both the rack and the alcohol supply, since a violation of the geometry of the structural units invariably leads to the fact that the ceilings simply break.