Useful tips
Photos can decorate any home, be it family photos, work photos or photos related to your hobbies.
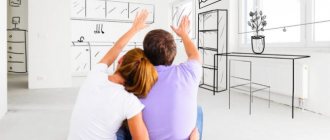
But in reality, the process of decorating a wall with photographs can be a painful task.
This doesn't mean you have to give up everything. You just need to learn a few tricks that will help you hang any photos neatly and evenly on the wall.
On our website you will also find:
- 10 original ways to decorate your home with vacation photos
- DIY butterflies on the wall
- How to decorate a wall with your own hands
- 10 simple works that can decorate any wall
- Beautiful and inexpensive DIY wall crafts
- 10 interesting ideas for decorating your favorite place in the house
- 9 ways to decorate your home with your favorite collections
How to hang a photo on the wall using wallpaper
Use a large piece of wallpaper or a roll of wrapping paper to hang several photos or paintings evenly.
You will need:
- wrapping
- photographs or paintings
- pencil
- adhesive tape
- nails and a hammer or other tools for attaching photographs to the wall.
1. Lay out the paper on a flat surface and place the frames with the photos you want to hang on it. Use a design on paper so that the distance between the frames is the same.
2. Trace the frames with a pencil.
3. Set the frames aside, hang the wrapping paper on the wall, and secure it temporarily with duct tape.
4. Using rectangles drawn on paper will make it easier for you to attach photo frames to the wall using nails and a hammer or other tools.
Family photos in the interior
There are many ways to use old family photographs in the interior - this visual thread that connects us with our past. In this article we will look at some of them.
The photographs themselves carry a certain element of intrigue and mystery, coming from time-yellowed photographs depicting our serene youth, and are windows into the past and a kind of time machine, taking us many years ago. What to do with photographs, how to revive them, make them work for your interior and decorate your everyday life, giving it a new dimension, a new gradient in the form of a time component?
Family history
Every person on our planet, no matter who he is, is someone’s child and grandson. We all have parents, grandparents and a host of relatives, and this connection is reflected in family photographs that we want to share with friends and loved ones. Here the photographs are located on two walls, well lit by sunlight. This arrangement emphasizes their importance. Below you can see other interesting ways to arrange treasured photographs in the interior.
Art photography on an easel
To emphasize the artistic merits of a photograph, you can simply place it on an easel, securing it with a stationery clip.
Volumetric glazed frame
A small collage of family photos looks great in a volumetric glass frame in a vintage style.
Use of glass
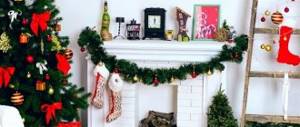
To display photographs in the interior, it is not at all necessary to place them in frames. Here are several ways to use a wide variety of clear glass vessels as family photo displays. This method provides greater flexibility and the ability to change exposure depending on holidays or significant family events. For example, at Christmas you can use photos with Santa Claus, and in the summer - resort photos.
Large and expressive photographs
A large-format photograph of a child, surrounded by contrasting drapery of curtains, can be an excellent design move in a family interior.
Combination of shapes and sizes.
Don't be afraid to experiment with shapes and sizes of photos and frames. Combinations that are incompatible at first glance with additional non-traditional decorative elements will only enhance the impression of the photographs and attract attention to them. Frames can come in a variety of designs, textures and styles, and vintage accessories will highlight your creativity.
Arranging photographs in the shape of an eye.
The interior can be decorated with a group of photographs arranged in the shape of an eye. The main thing is that the frames are of different colors, sizes, styles and have a different texture.
Transparent passe-partout
If you replace the passe-partout with transparent glass, you can highlight the beauty of the photographs in an original way and create a feeling of their dissolution in the space of the room. This is a very effective and inventive technique.
Use of molding and cornices
Molding is a popular way to decorate rooms and can also be used to display photographs using creative hanging hooks.
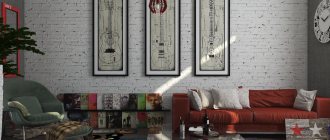
Arrangement of photographs along a line.
Black and white photographs, located in identical frames along one line, will highlight the architectural features of the room and create a modern atmosphere in the interior.
Photos on dishes.
Miniature plates can become unique frames for photographs of various shapes if they are mounted on stands or hung on the wall using adhesive stickers.
Place photographs around the perimeter of the room.
You can frame the room with photographs, placing frames around the perimeter. This will highlight the architectural features of the room and visually increase the height of the ceilings.
Unified framework
If you place a variety of photographs, combining them into a single composition using the same frames, unified in the same style, you can tell a whole story in pictures of various sizes and formats.
One photo in several frames.
The special meaning and importance of a unique family photograph can be emphasized by placing it in the center of several frames. Large gilded frames will draw attention to the miniature family heirloom.
Classic style.
Our home is traditionally associated with the concept of a family hearth. Therefore, it is only natural to place especially significant family photographs on the fireplace portal.
Use of accessories.
These days, photography can be easily applied to almost any surface. Simply print them out on regular transfer paper and follow the manufacturer's instructions. Therefore, you can decorate sofa cushions, lampshades, napkins and even blankets with family photos. It is recommended to group miniature photographs by hanging them on elegant silk ribbons to match the color of the walls.
Time Machine.
Photographs are a time machine that takes us back to the past. You can literally visualize this metaphor if you place a photo on the dial of a wall clock. Simply select a suitable frame and print it in accordance with the diameter of your existing watch. You can also purchase a clock mechanism from DIY stores, which come with detailed installation instructions.
Focal center.
Choose one photo and place it in what is called the focal center of the room. Such a placement will emphasize the significance of this photo for you and will constantly be in your field of vision, improving your mood with a reminder of an important event in your life.
Eclectic combinations
Photos of various shapes and sizes randomly placed on one panel will create a special holiday mood and add color to your interior.
Use of false panels.
Framed photographs can be placed in the space of false panels, thereby emphasizing the architectural details of the wall, decorating it with a portrait gallery of family members.
How to hang a photo straight using masking tape.
Masking tape can also be used to determine the exact location for nails or hooks.
1. Place your photo or poster frame face down and apply masking tape (not the adhesive side) to the hinge area.
2. Mark the places where the hinges are located on masking tape so you will know where to nail the nails.
3. Now take this piece of masking tape and stick it evenly to the wall. Use a level to ensure the tape adheres evenly.
* The construction level can be downloaded to a smartphone or tablet: “Bubble level” for an Android device or, for example, “iHandy Level” for an iPhone.
4. Nail in the places marked on the tape and remove the tape from the wall.
Wall decoration with photographs near the stairs.
You will need:
- wrapping paper or newspaper
- masking tape
- pencil
- scissors.
1. Place your photo frames on paper or newspaper and trace each frame. Cut out the resulting rectangles.
2. On the wall, mark the same distance from each staircase.
3. Glue masking tape to the wall (it comes off easily and without problems) - thereby marking the place where the frames will hang.
4. Using a level, begin gluing the paper rectangles evenly to the wall (using masking tape). You can start with two rectangles taped to opposite ends of masking tape.
5. Now tape the rectangle for one of the frames in the middle on the wall.
6. Start adding rectangles for the frames.
7. Nail the nails into the wall through the paper rectangles (after measuring the distance from the edges so that the nail in each frame is exactly in the middle).
8. Remove the tape from the paper and hang the photo frames.
Wall clock from photographs
The clock on the wall looks interesting and beautiful, with places for numbers decorated with photo frames. Such an unusual art object will attract attention. To do this, purchase a clock mechanism with long hands from a craft store. Insert the necessary photographs into frames and place them on the wall in accordance with the dial. Attach a clock mechanism with arrows in the center. Make the design of its front part from thick cardboard. Cut out a rectangle or square and insert into it the pin from the mechanism on which the arrows are attached.
Washi tape photo frames for wall Frames.
Washi tape - Japanese adhesive tape; aka Washi Tape.
You will need:
- washi tape
- Double-sided tape
- scissors or stationery knife
- level.
1. Use a level to evenly adhere the photo to the wall with double-sided tape.
2. Use washi tape to create a frame around the photo. Simply apply washi tape evenly around the image. You can create different patterns using this bright ribbon.
* Using scissors or a utility knife, carefully cut the washi tape to create even frames.
How to decorate a wall with photographs: weave a thread.
You will need:
- drawing of your design
- strong thread
- photos
- nails.
1. Draw on paper an approximate design of the thread that you are going to weave on the wall. You can draw arrows that will tell you where to turn the thread while weaving.
2. Using the instructions, nail the nails to the wall and begin weaving the thread around the nails to create the desired design.
Beds suspended on a rope in the interior
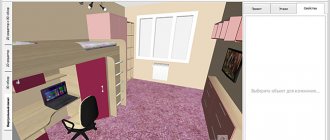
As we said above, a rope in the interior has not only a decorative function, but also a functional one - you can hang objects on it. Do you want to have hanging beds or swings in your apartment? Then go ahead! There is nothing more simple and, at the same time, original than a bed suspended on a thick rope. Just be sure to make sure that the ceiling can withstand such heavy loads. By the way, this idea can be implemented not only in an adult bedroom, but also in a children's room.
Hanging beds on a rope in a bedroom interior
Hanging beds on a rope in an exotic interior
In addition to completely suspended beds, which are attached to the ceiling using four ropes, you can also use a bed attached with the long side of the base to the wall and secured with ropes for safety (such beds are somewhat reminiscent of the upper bunks on a train). Teenagers will appreciate this idea for decorating a bed!
Rope in the interior - hanging beds
Rope in the interior - hanging beds