Parquet features
Let's start with the basics. Parquet board is a three-layer plank 1 to 2 m long, 180-200 mm wide, 14-22 mm thick. Its top layer is made of valuable species, and the next two are made of cheaper coniferous species. During production, a protective layer is applied to the surface of the planks. This can be a varnish, an oil-wax composition or a mixture of oils, which increase the wear resistance of the material and make it easier to maintain. Parquet boards have a locking connection system. When assembling, the tenon of one board is inserted into the groove of another and snapped into place.
Wooden boards are hygroscopic. At high air humidity, they tend to increase their geometric dimensions, which will cause warping of the planks. At low humidity, due to drying of the wood, the dimensions will decrease and a gap may appear between the wall and the parquet. Due to the multi-layer construction of parquet boards, these phenomena are not as noticeable as with solid wood products.
Optimal conditions for this material: room temperature - 18-22 ° C; relative humidity - 40-60%. These conditions are maintained using humidifiers in winter during the heating season, and air conditioners with a humidity reduction function in summer.
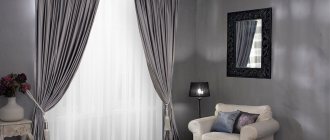
Why use parquet on the wall
Wall decoration with parquet is popular due to its easy installation and natural patterns. Traditional wood species for our latitude are used as the top decorative layer: oak, ash, birch, walnut, and exotic ones from different regions of the world: sapele, zebrawood, tigerwood, merbau. Due to the small thickness (0.6-6 mm), the cost remains affordable, unlike solid wood coating.
The coating becomes even more interesting due to the methods of wood processing: staining, tinting, thermal treatment, brushing and creating micro-bevels on two or four sides. These small cuts along the perimeter of the plank give a feeling of volume and at the same time hide the influence of seasonal humidity fluctuations.
Decorative techniques
Long and narrow elements are laid horizontally, vertically or diagonally; you can finish the entire wall or individual fragments. If you want to get decor without end joints, look for large size boards with a length of 2,200 mm or more. When laying diagonally, to reduce the amount of waste, short length strips are preferable. However, regardless of the laying scheme, when ordering material, it is necessary to add 5% to the actual cladding area for possible trimming.
Parquet board
A popular alternative is parquet boards, which, unlike laminate, are a completely natural product. Structurally, it is a three-layer board, the length of which varies from 1 to 2 meters, width from 18 to 20 cm, and thickness from 1.4 to 2.2 cm. To make the top decorative layer, a valuable species of wood is used, the unique natural pattern of which the shade shapes the appearance of the coating. The middle layer consists of slats located across the first layer, and the third is the backing. Both layers are made from inexpensive but durable coniferous wood.
Parquet board structure
The top decorative layer is coated during the manufacturing process with a protective composition - varnish, oil or oil-wax, which increases the performance properties of the wood, its wear resistance, durability and makes it easier to care for the coating.
The structure of the parquet board
A reliable fit of the planks and their strong fixation is ensured by a tongue-and-groove locking connection located at all ends of the board. The assembly method of parquet boards is similar to laminate.
Manufacturers offer several types of parquet boards:
- A single-strip board is represented by a plank of a certain width.
- Two-strip is a lamella of standard width, which visually consists of two narrower dies laid in two rows with the end joint offset.
- Three-strip is represented by a board, the front layer of which imitates three rows of small-width tiles that look like block parquet. The coating pattern turns out to be more motley and “moving”.
Types of slats
Features of the material
Hygroscopicity is a property of all materials made from natural wood. When the humidity in the room changes, they increase in size, which leads to warping of the planks, and when the humidity decreases, the material dries out, leading to the formation of cracks between the boards. This property of the material was taken into account when choosing the design of the parquet board - its multilayer nature and the perpendicular arrangement of the slats of the inner layer contribute to the resistance of the product to negative factors and allow the wood to resist natural changes in the geometric parameters of the lamella.
Open plan apartment interior
However, it is important to ensure an optimal microclimate in the room where such coating will be used. The air temperature should be between 18 - 20 degrees, and the humidity should be 40 - 60%. To do this, it is enough to use a humidifier in the winter to protect the wood from drying out, and in the summer to reduce the humidity using an air conditioner with the appropriate function.
Layers of lamellas with a protective varnish coating
Advantages of parquet boards on the wall
The designers made the right decision when they decided to use this floor covering for wall cladding. Among the positive qualities of the material, the following can be noted:
- A wide range of prices, which allows you to choose coverage to suit any budget.
- The simple installation process does not require any special skills or tools.
- A large assortment of shades and options for wood used for the face layer. On sale you can find coatings from the usual oak, ash, birch and alder to exotic tigerwood, sapele, zebrawood and merbau.
- Even when using expensive valuable wood species, the cost of parquet boards is lower than solid wood, since the decorative layer is only 0.6 - 6 mm.
- Thanks to the ability to subject the front layer to processing using various technologies (staining, tinting, brushing), the decorative effect of the product can be significantly increased and its natural pattern can be emphasized.
- The volume of the slats is given by chamfers located around the perimeter or on both sides of the lamella.
Stress distribution in the board
There are several ways to lay parquet boards on a vertical surface:
- The slats can be laid along or across the wall.
- In a small room, diagonal laying can be used.
- The wall can be covered completely or a fragment of it can be selected to create an accent.
Herringbone styling
It is worth considering that horizontal laying visually expands the space. This method is used in small rooms - kitchens and hallways. When laid vertically, you can visually increase the height of the room. Relevant for living rooms. Diagonal laying is a universal solution that blurs the boundaries of space, but it is worth considering that this method is associated with excessive consumption of material. To prevent this from happening, choose slats of short length.
What to look for when choosing
When choosing a parquet board for wall decoration, you do not need to focus on the wear resistance of the wood species, since the coating will not be subject to the same loads that are exerted on the flooring material. In this regard, you can purchase slats from any type of wood with medium or low hardness - cherry, pear, alder, birch, which they prefer not to use for flooring.
Protective varnish coating
The method of processing the front layer is selected individually for each individual interior solution - in some cases the bright, glossy shine of a varnished coating will be appropriate, but in other cases it will be necessary to create the effect of untreated wood by covering it with colorless varnish.
Note! Using boards with a length of 2.2 m or more, you can obtain a coating without end joints.
Laying parquet boards is quick and does not require special skills. Below are detailed instructions and sequence of actions when creating an accent wall surface.
Table 2. Step-by-step installation instructions
| Illustration | Description |
| Using guides on the wall, a level base is created for the future covering. The installation step is about 50 cm. | |
| The position of each guide is determined using a building level. | |
| It is important to ensure that each plank is positioned strictly perpendicular to the floor. | |
| Work begins with the installation of the central guide. Using a level, markings are applied to the wall, locations for drilling are determined, and the guide is secured with self-tapping screws. The hole spacing is 60-70 cm. | |
| Attaching the lamellas begins from the left corner. | |
| The board is stopped with the lock facing up. | |
| Before you begin fixing the first lamella, you need to evaluate its location relative to the floor surface. | |
| If the board lies unevenly, then its position is corrected using a spacer. | |
| Set the position according to the level. | |
| Markings are applied and the lamella is cut from the tenon side. All the planks of the first row are trimmed in the same way. | |
| The first and last rows are installed using special clips. | |
| On the back side of the lamella, mark the center of the guides. | |
| The clips are fixed on the back side of the slats in accordance with the markings. | |
| Using a clip, the first board is snapped into the guide. | |
| The first board is fixed on top using parquet clips, pressing the groove. | |
| The next board of the first row is fixed using clips and the end lock of the previously installed lamella. | |
| Clips must be installed on each rail. | |
| The lamella of the second row is inserted at an angle into the lock of the previously installed board and snapped into place. | |
| It is fixed on top with a parquet clip. All subsequent rows are laid in the same way. |
Table 3. Installation of the last row
| Illustration | Description |
| First, the lamella is cut from the lock side. | |
| To install the last row, you will need special clips fixed on the back of the slats. | |
| To determine the location of the clips, stick a piece of masking tape above each guide, on which the middle of the guide is marked. | |
| Then the markings are transferred to the reverse side of the lamella. | |
| Fix the clips in accordance with the markings. | |
| Similar to installing the first row of planks, the clips are snapped into the guides. | |
| It only takes a little effort to snap the clip into place and it snaps easily. | |
| You can add aesthetics and completeness to the structure using an aluminum corner that will hide the ends of the lamellas. | |
| A wooden corner to match the board will look organic. |
Correct installation of parquet boards requires compliance with several important rules, as well as all the nuances of the phased work. Only then will the flooring be smooth and beautiful, which means it will last not just one year, but several times longer.
What wood to choose for walls
On the wall, boards do not need the same reliable protection from abrasion as on the floor. Therefore, products with a top layer of any type of wood are suitable, including medium and low hardness: cherry, pear, alder, birch, which are not very practical on floors. Compositions for treating the surface of wood (varnish, oil, oil-wax) are also considered from a design point of view. In some interiors, for example, in the kitchen, it is preferable to boards with a spectacular and bright glossy varnish, and in the bedroom or living room - with colorless oil, which creates the impression of natural untreated wood.
Manufacturers of wood flooring began to produce special series of boards and decorative panels for walls and ceilings, including those with a complex surface topography or 3D effect. In their combination with other wooden interior elements (floors, stairs), the harmony of material, shape and color is most fully manifested.
How to install parquet on a wall
Parquet boards for laying parquet on a wall must be ordered when all wet processes (installation of screed, self-leveling floor, plastering and puttying of walls and ceilings) have been completed, the leveling layers have been dried, and the heating and ventilation system are well established. Laying of the coating begins only when the moisture content in the base drops to 2–3% (more accurate data is indicated by the manufacturer in the instructions for the specific material). Otherwise, the slats will absorb evaporating moisture, increase in size, bend, and in the worst case, the slats of the top layer may peel off.
Remember that the same rules apply here as when installing parquet boards on the floor. Before starting work, sealed packages with material are kept in room conditions for at least 48 hours for acclimatization. Don't rush, especially if you brought the boards from the cold into a warm house. Condensation immediately forms on them. The wood absorbs it, and if you start laying it right away, then after a while gaps will appear between the planks. Small (1 cm) deformation gaps must be left at the joints with the floor and ceiling.
The installation method also plays a role, for example, herringbone parquet creates the most uniform load on the wall.
Related article: Do-it-yourself wallpapering of walls with non-woven wallpaper
Wall decoration with parquet boards: design options in the apartment
There are several design options when decorating walls with parquet boards:
- Across the wall;
- Along;
- In a diagonal direction;
- Over the entire surface of the wall;
- On a separate site;
- Arbitrarily.
Sheathing on plasterboard walls
In the case where the walls were lined with plasterboard as part of a previous or current renovation, this only plays into the hands and also makes the work of the home craftsman easier. You will need to make a sheathing of wooden slats 20x20 mm, with a distance between the slats of thirty to forty centimeters.
The orientation of the parquet and sheathing slats is directed in different directions, that is, they must be perpendicular to each other. If the tiles are placed diagonally, the slats will go in the same direction, but they must be perpendicular to the floorboards.
If only the lower section of the wall is sheathed, then work also begins from below. But if the entire wall is to be sheathed, then the first tile is laid in the upper part. Then the movement is from left to right. In this situation, the same rules for laying parquet as on the floor apply - there is a need to provide a technological gap between the walls and the edge of the parquet.
The dies are attached using parquet glue or by driving staples into the corresponding locking joints. If glue is used, it is applied not only to the wall, but also to the back of the dies, using zigzag movements.
As the final stage, the installation of skirting boards and corners is carried out. Thanks to them, technical gaps left in advance are closed, as well as joints with the floor and ceiling.
How to mount on concrete or brick walls
The process of installing concrete or brick walls will be no different from a wall made of plasterboard or chipboard. The main requirement is that the wall must be smooth and free from flaws, defects, and damage.
If it is necessary to mount heavy objects on the wall, a concrete wall partially wins among other options. The most powerful fasteners can be driven into a concrete wall that can withstand heavy loads. For other situations, you will need an individual approach when choosing the type of fasteners and the method of their location.
Types of parquet boards: selection criteria
With all the richness of choice of design solutions and manufacturing materials, parquet boards are divided into two main types - solid and multilayer. The main differences depend on the method of production of the products.
The massive board is made from solid wood of valuable species. The fixing elements are standard - groove, ridge. Located on the end edges of the boards.
To make multilayer boards, valuable wood veneer is used. But unlike massive boards, multilayer boards consist of 2-3 layers of thin planks glued together with a heavy-duty adhesive. To ensure reliable fixation, layers of wooden planks are attached in a perpendicular position to the previous layer. Multilayer parquet boards look like this:
- The top, front layer has a thickness of 1-6 mm. It is made from hard wood, impregnated with a special oil composition that protects the wood from rapid wear, or varnished with tinted or colorless varnish.
- The middle layer of parquet boards is made from coniferous wood. Typically, short wooden strips or moisture-resistant plywood are used in production.
- The bottom layer, which must withstand the greatest load, is made of durable hardwood plywood. Its thickness is usually 2-4 mm.
The total thickness of multilayer and solid parquet boards is 7-22 mm. This indicator affects the heat, noise and sound insulation properties of the material, its performance characteristics. Focusing primarily on these technical characteristics, they choose methods for laying parquet boards.
So, with a thickness not exceeding 20 mm, flooring can only be done on a continuous, perfectly flat surface. Installation of floors made of parquet boards with a thickness of over 20 mm can be carried out either on an appropriately prepared subfloor or, if necessary, directly on joists.
Among other things, when choosing a material, the location options and the number of rows of planks on the top layer are taken into account. Based on these indicators, parquet boards are classified into one-, two-, three- and four-strip. The pattern is laid out in the form of “herringbone”, “square”, “braid”, Dutch pattern, “deck”.
The most expensive parquet boards are single- and double-strip. If you want to create the effect of a solid board floor, priority is given to products with a solid face layer.
Three-strip parquet boards are the most popular. The pattern on the front layer of the product imitates piece parquet, while the cost of the material is more than affordable.
The lowest prices can be found in the four-strip parquet planks category. In production, very narrow, thin lamellas are used to create the front layer. The result is a spectacular contrasting pattern, thanks to which it becomes possible to implement a variety of design solutions.
Key technological points
An activity such as laying parquet boards with your own hands is not particularly labor-intensive and quite doable. But in any case, you need to approach the task at hand with maximum responsibility. There are nuances that must be considered, since the quality of the work performed largely depends on them.
To ensure that your flooring remains durable and reliable for many years, it is important to adhere to the following rules:
- Carefully prepare the base for laying parquet boards, create a smooth, durable surface without any damage, cracks, bulges and depressions, or areas of high humidity. The maximum value of permissible height differences is 2 mm per linear meter, humidity (measured with a moisture meter) is no more than 3%.
- Laying parquet boards using the technology in rooms with increased operational load and humidity (bathroom, kitchen, toilet, corridor) is not recommended.
- To ensure that the boards do not deform and lose their structural integrity upon completion of the flooring, the material must be kept indoors for 2 days before installation.
- During the installation of lamellas, the humidity in the room should be 35-65%, the average air temperature should be +18°C.
- To protect the wood from the destructive effects of water and temperature changes, a two-layer substrate of heat and waterproofing material must be installed between the base and the parquet board.
- To make the joints of the rows less noticeable visually, the boards should be laid in the direction of the flow of natural light.
If you install parquet boards yourself in rooms with a “warm floor” system, the wooden floor covering is installed insulated in each room. This is due to the fact that due to possible temperature changes, wooden slats can warp, crack, or become deformed.
Preparing the base
The base for laying parquet boards can be either a fresh or a used concrete or wooden surface. When it comes to installing a new floor from scratch, each stage of work must be carried out taking into account the final laying of a layer of parquet boards. If the floor covering is renewed, that is, the flooring is made on the old floor, it is necessary to subject it to a thorough revision. If necessary, repair damaged areas.
If obvious unevenness or bulges are detected on the surface of the base, they are leveled using special leveling compounds based on dry mixtures. If the permissible humidity standards are exceeded, the base is covered with an overlapping vapor barrier film, sealing all joints with construction tape. The second, simpler option for creating a vapor barrier layer is to treat the subfloor with a special primer.
There are different ways to lay parquet boards: floating, glued, fastened. Installation of flooring using the floating fastening method is carried out by locking the lamellas or fixing them to the base using special adhesives. The fastening one, with the exception of some points, is similar to the floating glueless one. When choosing the adhesive method of flooring, the parquet board is joined and glued to the base.
Taking into account the above, for practical application it will be enough to study in detail the floating method of laying parquet boards with your own hands. The step-by-step instructions provide a strict order for performing each subsequent stage of work.
Laying a floating floor from a parquet board: instructions
After arranging the base, preparing the tools necessary for the work and calculating the required amount of material, you can proceed directly to laying the floor.
Step-by-step instructions for laying parquet boards with your own hands step by step:
- The base is covered with plastic film (thickness 200 microns). To ensure that the surface is solid, the waterproofing material is laid with an overlap of 15-20 cm. The overlap on the walls is left 10-15 cm. The joints of the film are glued together with construction tape.
- A layer of warm underlay made of foamed polyethylene, cork sheets or expanded polystyrene is placed on top of the waterproofing layer. The method of laying polyethylene is overlapping; polystyrene foam and cork are laid end-to-end. The joints of the thermal insulation sheets are secured with tape.
- Calculate the total number of rows of flooring. If the last row turns out to be narrow, the boards will have to be cut, leaving a minimum width of 5 cm. If it is impossible to meet this requirement, the boards for laying the first row are cut so that their width is the same as in the last row.
- Laying the 1st row: cut off the tenon, connect the boards to each other, lay them with the end (with the tenon) side to the wall.
- A gap of 10-15 mm is left near the wall, for which pre-prepared wooden pegs are driven into the base.
- To create a durable floor, the parquet boards are laid staggered. This means that the length of the first panel of the 2nd row should be 2/3 of the standard one.
- The boards of the 2nd row are first connected to each other, then moved (brought) to the 1st row. The tongue and groove are tightly connected.
- Laying the 3rd row begins with cutting the boards. Its length should be 1/3 of the standard one. Otherwise, the order of work is repeated.
- The first board of the 4th row has a standard length.
- The remaining rows are laid in the same order as the first 4.
Finishing the boards of one row and creating a single surface is done by hammering the panels into the right place with a hammer through a wide block of wood. The last board in the row is also finished off with a hammer, but through a clamp.
Upon completion of the work, the pegs driven along the walls are removed. Then, using clamps attached to the wall, install and fix the plinth. The first clamp is driven into the wall, retreating 15-20 cm from the corner. The subsequent ones are fixed at a distance of 40-50 cm from each other.
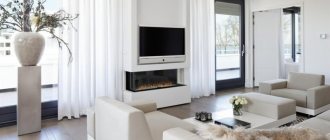
Examples in the kitchen and living room
With the right selection of materials for wall decoration, you can achieve significant design success. The result also depends on the choice of textiles, furniture, colors and some other factors that are taken into account when decorating a kitchen or living room.
In these rooms, variations in the laying of parquet are of considerable importance. Depending on the expected effect, you can use one of the main options:
- The horizontal arrangement of the panels makes it possible to visually expand the room, which can be important for a kitchen, which is usually small.
- Vertical installation visually increases the height of the ceilings. This trick is best applied to the living room to achieve incredible design solutions.
- Diagonal cladding is a universal option that makes it possible to blur the volume and boundaries of the room.
Parquet panels are cared for using specialized care products. Follow the correct humidity and temperature ranges as specified by the manufacturer.
Using parquet as a wall covering is an unusual, but original and practical solution. This is an easy-to-install and maintain material that is suitable for a wide range of users.
Related article: Ideas for covering walls with different wallpapers
Preparatory work
Work on installing parquet boards begins with calculating the amount of materials. This process is simple - we multiply the height of the wall by its width and subtract the area of windows or doors (if any) from the result obtained. To the resulting number you need to add another 10% for adjustment. When sheathing complex geometric shapes, it is recommended to divide the surface into squares, calculate the area of each of them, and then sum up all the numbers. You should also consider the direction of laying the panels and their dimensions in order to minimize the amount of waste.
The purchased lumber should lie in the room for several days for acclimatization. In the meantime, you need to start preparing the surface. It must be perfectly flat, so it is recommended to use plywood, plasterboard or chipboard as a base for the sheathing. As an option, you can use wooden sheathing made of slats, horizontal or vertical, depending on the method of laying the panels.
If there is any doubt about the dryness of the walls (for example, there are water supply pipes inside), it is recommended to use a vapor barrier that blocks the penetration of moisture.
The next stage is choosing the starting point for installation and setting the level. If the parquet board will be mounted horizontally, a line drawn using a level at a distance of the width of one panel from the ceiling is selected as the starting point. If the sheathing is to replace only the bottom portion of the wall, mark the starting point one board's width from the floor. When placing the panel vertically, the line is drawn at a similar distance from the corner of the wall.
Functions of parquet in wall decoration
Aesthetic. Natural wood is so beautiful that you want to see it not only on the floor, but also in other finishes, including on the walls and ceiling. Thanks to clever design techniques such as finishing the walls, ceiling and floor with the same material, you get the cool effect of a capsule in which it is comfortable to stay.
Due to the natural warmth and responsiveness of wood, parquet on the walls allows you to realize the dream of a cozy room filled with charm and natural beauty.
Practical. Using parquet or wall panels you can further soundproof the room. Coswick even produces special soundproofing panels for offices and other premises where this function is especially important. Knowing the intricacies of installing parquet boards on walls, you can level them without using drywall and plaster.
“Box” made of parquet boards. Transfer project Housing Issue
Instructions for installing the board on the wall surface
Is it possible to decorate the walls with solid boards yourself, without experience and the necessary abilities? This is possible, but only if you approach the process with the utmost care and seriousness. At the beginning of finishing, it is necessary to check the availability of the necessary tools for the purpose of carrying out the work. The process will require:
- square;
- folding meter;
- hammer;
- pencil;
- plumb line;
- wedges;
- sharpened knife;
- glue;
- finishing rail and crutch;
- jigsaw;
- drill (cutting attachment - for making holes for pipes whose diameter is larger than the pipe diameter).
Individual situations may require spontaneous tools, so think things through in advance
The preparation of the base has already been noted - traditional gypsum board will do. What about solid wood
, then at the beginning of work it makes sense to give it time to “adapt” to the indoor conditions for 1-2 days.
The installation of parquet begins with the installation of lathing. Wood slats or bars are suitable for this. They are fixed to the wall surface at a distance of 25-40 cm, using a measuring level. The position of the lathing strips depends on the future position of the solid board . Vertical dies are horizontal strips for sheathing and vice versa.
Example of lathing on a balcony
Small difficulties may arise during the installation of solid boards
diagonally to the base of the wall. In this embodiment, the frame frame should also be placed diagonally, maintaining a right angle between its system and the floor base (use a square).
As for fastening options, mounted using either small nails or an adhesive base. In both cases, the dies are attached from left to right.
Choosing wood wall decoration
You can even decorate the walls with laminate. But experts do not recommend cutting it yourself, as this will damage the integrity of the polymer layer. In addition, by purchasing laminate flooring, you will not experience all the charm of natural wood in the house: the unique beauty of the design, pleasant sound and tactile pleasure.
Wooden wall panels. The most suitable way to decorate walls with wood. These panels are slabs with a load-bearing layer of plywood or HDF and decorative veneer with various tones. Such panels are offered by Coswick. Its catalog includes a choice of many colors and three types of wood: ash, oak and American walnut. All panels are already finished, so after their installation the walls are immediately ready for use.
Coswick decorative wall panels
Massive board. The most natural type of parquet on the wall, because each full-thickness board consists of an array of valuable species - oak, ash, maple, merbau and others. This material is more expensive than all the options, but if you need to decorate only a small area of the room, a solid board is perfect.
Engineered and parquet boards. An excellent option for wall finishing: at a more affordable price than solid wood, engineered parquet is visually indistinguishable from it. A huge selection of colors, treatments and sizes allows you to find the perfect combination with other interior elements.
Project Cork and Kaslin transmission Housing issue. The dining area of the living room is decorated with a massive kaslin board
Cork panels and parquet. Cork parquet has long been firmly established in the interiors of apartments and houses. This is a natural, affordable and interestingly designed coating that is chosen for finishing not only floors, but also walls and ceilings.
In addition to parquet, wallpaper, wall panels and tiles are made from cork. Wallpaper is more affordable and easier to install, but it requires pre-leveled walls. Special slabs and cork parquet are a little more difficult to install, but they are reliable, easy to maintain and durable.
If you think that cork wall coverings are monotonous, then you are mistaken. Manufacturers such as Corkart offer a huge selection of cork flooring designs, including wallpaper, panels, tiles and parquet.
Choice of cork wallpaper colors from Corkart
Cork on the wall of a restaurant in Arizona
Installation of solid boards on the wall surface: invisible moments
Positive quality of solid wood
is that it is absolutely ready for installation and does not require preparatory preparation.
But as for the base - the wall - its surface will need to be given some time. The main thing is to check the surface for chips, bumps, cracks and other imperfections. An uneven wall can be simply and easily leveled using plasterboard sheets.
Parquet also looks good on walls made of plaster with relief.
Calculating the number of solid boards for finishing the room is very important than preparing for the base. To do this, it will be enough to recall the area formula from the school course. By multiplying the length of the room by the width, it will be possible to obtain the area, and based on this, calculate the amount of material with an extra charge of 10-12% for unexpected consumption.
In many cases, solid boards for wall do not cause any difficulties during the installation process, even if it is performed for the first time and without the necessary skills. Real wood is easy to finish, and chips and cracks formed during the process are simply masked using a putty mixture or tinting.
A jigsaw is used to process the boards, taking into account the high level of strength of the dies. The adjustment of corners using slats does not always work out well the first time due to the ability of the components to break during processing, so in case something goes wrong, it is necessary to stock up on ideas for decorative design of areas with formed defects.
For any stage of laying parquet floors you need your own tools
It is important to remember that wall with parquet does not have the same effect in all situations. Much depends on the placement of the dies. So, for example, if you put them vertically, the ceilings in the room will visually appear higher. In a horizontal position, laying boards will visually make the total area larger, while correcting the proportions of the geometry will become possible thanks to the diagonal placement of the boards.
Application of solid boards
in the interior with vertical or horizontal installation, it involves almost waste-free cladding, which increases material consumption. You can save money, but only if you form diagonal lines from short panels.
Installing parquet on the wall
Installing parquet on a wall must strictly comply with all the requirements stated by the manufacturer. The humidity in the room should not be higher than 65 and lower than 40%, and the temperature should be kept at 18-21 degrees. Wall humidity is not higher than 12%.
Parquet and wall panels are installed on a timber frame or profile frame. Some manufacturers also offer special fastenings for reliable and quick fixation of each row of parquet to the profile.
Laying parquet on the wall starts from the top. When installing the last row between the floor and the board, it is important to leave a technological gap so that during the seasonal expansion of the wood the boards do not swell or crack.
The process of installing parquet and engineered boards on the wall
Installing parquet boards “in a circle” for a capsule effect. In the corners the parquet board is cut and bent Project of transfer Housing issue
Related article: How to soundproof a wall from neighbors
Cork parquet and panels are installed in the same way - on a frame made of wood or profile. Cork wallpaper and flexible boards are fixed to the walls and ceiling using cork glue.
Cost of labor and installation instructions
ALL SAMPLES PRESENTED ON OUR WEBSITE CAN BE VIEWED AND BUYED IN THE SHOWROOM AT 82 LENINSKY PROSPECT IN MOSCOW
NEW HOUSEERS DISCOUNT FROM 30 M2
| NAME OF WORKS AND SERVICES | price, rub) |
| Dismantling | Negotiable |
| Non-standard types of work | Negotiable |
| Concrete base primer | 120 rub.m² |
| Vapor barrier of the base with film | 100 rub.m² |
| Leveling the base of self-leveling floor (without mass cost) | 450 rub.m² |
| Pouring sand concrete floor screeds | 450 rub.m² |
| Sanding laid plywood | 200 rub.m² |
| Laying plywood on a concrete base using glue and dowel screws | 300 rub.m² |
| Laying Laminate on a substrate (straight/diagonal) | 400/450 rub.m² |
| Laying Parquet and Engineering boards on the substrate (straight/diagonal) | 500/550 rub.m² |
| Gluing parquet boards (straight/diagonal) | 950/1000 rub.m² |
| Gluing Engineering Board (straight/diagonal) | 950/1000 rub.m² |
| Gluing a solid board onto a plywood base (straight/diagonal) | 950/1000 rub.m2 |
| Complete installation of Parquet including sanding and varnishing | 1200/1250 rub.m² |
| Laying Engineering boards (French Christmas tree, English Christmas tree, Hungarian Christmas tree) | 1100 rub.m² |
| Laying solid boards (French Christmas tree, English Christmas tree, Hungarian Christmas tree) | 1200 rub.m² |
| Laying modular parquet | 1400/1450 rub.m² |
| Laying Artistic Parquet (Figure according to drawing) | 1850 rub.m² |
| Installation of terrace boards | 1400 rub.m² |
| Installation of logs for deck boards | 500 rub.m² |
| Installation of Supports | 400 rub.m² |
| Installing a decorative ring on a pipe | 160 RUR pcs. |
| Installation of plastic skirting board | 200 rub.m/p |
| Installation of a cork compensator | 300 rub.m/p |
| Veneered plinth installation | 350 rub.m/p |
| Installation of MDF plinth | 350 rub.m/p |
| Installation of radius plinth | 950 rub.m/p |
| Installation of solid baseboard | 500 rub.m/p |
| Visit of a process engineer to the site for consultation in Moscow | 1000 rub. |
| Departure of a process engineer to a site outside the Moscow Ring Road (within 20 km) | 1500 rub. |
| Departure of a process engineer to a site outside the Moscow Ring Road (more than 20 km) | Negotiable |
Methods of laying floor coverings.
Attention: work on laying floor coverings is carried out only after all painting, plastering and wallpaper work has been completed and the readiness of the room has been checked.
REMINDER
To achieve the best results, professional styling by specialists is required.
Here you will find information about receiving, storing, laying and caring for parquet boards. The parquet board you purchased is a finished product, coated with varnish or oil, which does not require additional sanding or application of protective coatings. Parquet, solid wood boards, parquet boards, laminate are not subject to mandatory certification in accordance with the current legislation of the Russian Federation . After solid wood boards have been accepted, and this is an inspection (opening) of no more than 3% of the purchased volume (m2). Before installation, parquet boards should be stored only in closed packages on shelves and no closer than 50 cm from the walls, at a temperature of +18° to +20°C and an air humidity of 40 (30) - 60%. The parquet board has an equilibrium humidity W = 9±3%; additional drying of the material is not provided. In winter, the parquet board must be left for at least 48 hours to acclimatize in the room where it will be installed. The packaging must be opened immediately before installation; opening the packaging from the end is prohibited.
Wood deformation values.
For parquet boards with humidity W= 9±3% and thickness 14-15 mm, the following deviations from the nominal dimensions are allowed:
The given values of deviations from the nominal dimensions are possible at temperatures from +18 to +22°C and air humidity Wh = 40 (30) - 60% in the room where the installation and operation of the floor covering is carried out.
If temperature and humidity conditions are not observed, the amount of actual deformation of wood can be very significant. Thus, when the air humidity changes to Wh=20% at a temperature of more than +20°C (+5-7ºC) (winter, room with central heating and without additional humidification), the wood moisture content drops to minus 5%, which leads wood products to drying and cracking (loss of elasticity).
Before you start styling.
Requirements for grounds.
Before starting work, it is imperative to check the quality of the base, because... It is the quality of the foundation that influences the final result of the work. Tearing a solid board from the base will require not only replacement of the floor covering, but also the cost of re-installation.
Evenness of the base . The clearance between the two-meter control level and the surface being tested should not exceed 2 mm in level and is checked with a clinometer. Leveling is achieved only with the help of leveling mixtures.
Substrate moisture . The humidity of reinforced concrete panels should be no higher than Rh = 4%, screeds made of cement-sand mortar - no higher than Rh = 5%, screeds made of anhydrite base (gypsum) Rh = 0.4%, plank base - no higher than Rh = 10%. A cement screed with a thickness of 4.0-5.0 cm must be cured (dry, gain strength) before laying the floor coverings for at least 8 weeks. With a larger screed thickness, for every additional 1 cm, an additional 1.5-2 weeks are required for drying in addition to the 8 weeks indicated above.
Foundation strength . An unstable base can be destroyed due to temperature and humidity deformations of the floor covering or with increased loads on certain areas of the floor, because The strength of parquet adhesives is, as a rule, significantly higher than the strength of substrates. The strength of the base can be subjectively tested by scratching the surface with a sharp object along the grid (cross scratches). If only scratches remain (there is no chipping of the material at the intersection points), then the base is quite strong. The base must have a strength of 15 MPa, the strength level is checked with a sclerometer (concrete strength meter). The strength of the base made of high-quality moisture-resistant plywood of the FK brand is sufficient and does not require special testing.
Foundation stability . An unstable (sagging, swaying, etc.) base will lead to rapid destruction of the parquet floor or to a significant reduction in its service life. Subfloor settlement should not exceed 1.0 mm under a load of 100 kg.
Cleanliness of the base. Before starting work, the base must be thoroughly cleaned of dust, as well as bitumen, paint, mastics and other possible contaminants and treated with a primer. It should be especially noted that the remains of bitumen and old bitumen mastics are incompatible with modern parquet adhesives.
Tool Recommendations
To lay the board, we recommend using the following tools and accessories:
- hammer (800 gr)
- electric jigsaw
- circular saw on carriage
- rack level (2 m)
- tape measure (3 m)
- plastic finishing strip (at least 300 mm long)
- pencil
- spacer wedges
- square
- fry
- moisture meter
- electric drill
- drills, crowns (for pipes)
Attention: There are several installation options available.
Laying in a rigidly fixed way .
- Be sure to use one or two-component glue, a primer for treating the base (CP screeds, primer for plywood is not provided) (primer for this glue). We connect the panels using profiled longitudinal and end elements; we begin assembling the first row from left to right. Laying is carried out both on a screed and on a plywood base with fixation with a screw (plywood base) or a parquet stud (any base).
Laying in a floating - carpet way.
When laying the floating carpet method on any base, it is necessary to lay a separating membrane (polyethylene film 0.2 mm thick or 200 mKr). Connected with an overlap and taped with double-sided tape, with an extension to the walls of up to 50 mm (after completing the laying of the board and before installing the plinth, the membrane is trimmed, leaving 10 mm from the clean floor), then lay a shock-absorbing and sound-absorbing substrate no more than 2-3 mm thick. It is not recommended to glue or glue the substrate.
Wood products are subject to deformation . To do this, before laying the floorboards, it is necessary to make relief seams on the back side at an angle of 65-67º, the pitch between the seams is determined visually depending on the release of tension at the base of the board with a plywood base. We connect the floorboards using profiled elements. Laying starts from left to right. To do this, you need to insert the panel into the panel at an angle of 40-45 degrees and roll it forward/backward. A “5G” lock is used in the end and longitudinal connections. The lock works on the principle of a spring; you need to insert the panel into the panel and slightly raise it in the connection until it tightens. After the row is assembled, insert it into the carpet as shown in the figure.
Examples of preparing various types of bases for laying parquet boards.
Laying in the presence of a ready-made, durable screed from 10 to 15 mPa:
— primer of the screed (in accordance with the selected primer for the leveling mass)
— applying a layer of leveling quick-hardening putty
- primer of putty for glue (after it dries) in accordance with the type of glue
-laying moisture-resistant plywood of the FK-12 mm and FK-10 mm grades in two layers with fastening with glue and screws (a standard sheet is cut into 4 parts, 76 x 76 cm, the resulting squares with a discrete cut are laid at an angle of 45° to the finishing coating )
Laying in the presence of floors with significant ledges between the slabs:
— waterproofing is carried out on the ceiling (for example, from hydroglass insulation or Aqua Stop)
- a screed with a thickness of at least 50 mm is made (cement + sand in a ratio of 1: 3 with the addition of a plasticizer)
- further (after the screed is ready) completely in accordance with paragraph 1
Laying on joists:
— logs are installed according to the level (log cross-section is at least 50 x 50 mm, axial pitch is 400 mm)
— 1st layer: moisture-resistant plywood grade FK-18 mm (solid sheets 1500 x 1500 mm, fastened to joists with anodized screws)
— 2nd layer: moisture-resistant plywood grade FK-12 mm (solid sheets with discrete cuts 1500 x 1500 mm with overlapping joints of the bottom layer at an angle of 45° relative to the finish coating, fastened with glue and anodized screws)
Installation on old wooden floors:
— rough grinding of the floor to level it and remove old paint, varnish, mastic, etc.
— moisture-resistant plywood grade FK-18mm — first layer; moisture-resistant plywood brand FK-12 mm - second layer (solid sheets with discrete cuts 1500 x 1500 mm with overlapping joints of the bottom layer at an angle of 45° relative to the finishing coating, fastened with glue and screws)
If you do not have sufficient knowledge and experience in performing parquet work, please contact the professionals!
Factors affecting the quality of flooring
Before and during installation, it is necessary to control the quality of the floor parts being laid. Defect detection must be carried out, floor parts are checked for moisture, then the material is laid out on a “dry” basis for selection by color and texture, and presented to the Customer. Boards (floorboards) that have defects are subject to complaint at the point of sale (place of purchase of the floor covering). Damaged floorboards must not be installed. The laying worker is responsible for the consequences caused by the use of defective floorboard parts, as well as failure to comply with the “Technology for laying floor coverings.” Defects caused by these violations cannot be filed for complaint after laying the parquet board, so it is necessary to follow the established rules for installation and operation, maintain the temperature and humidity in the room, which will prevent warping and deformation (cracking of the floorboards) of the coating.
Due to natural causes, such as exposure to ultraviolet radiation, discoloration on the facial area may occur over time. These changes are not subject to complaint. Wood products are a natural material, therefore slight differences in color are possible, which also do not constitute a basis for a complaint.
Expansion gaps
When laying the floor, it is necessary to create compensation gaps of at least 10 mm between the floor covering and walls, pipes, and primarily in doorways. In large rooms, it is necessary to maintain a compensation gap of 1.5 mm for each meter of floor width and length. This gap is required around the entire perimeter of the floor. If the floor width exceeds 8 m, the floor covering must be divided by an expansion gap and covered with a connecting profile (threshold). In order to carry out the installation correctly, before starting work you will need to make a series of measurements to calculate the area of the material to be laid and the dimensions of the first row (the width of the floorboard). This is necessary so that when laying the last row, its width is at least 40% of the width of the parquet board.
Heated floor structures
Before starting work on installing heated floors at the site, all general construction and special work, the implementation of which may cause damage to the floor, must be completed. The base on which the construction of heated floors is arranged must meet the requirements of SNiP. 2.03.13-88 “Floors” and SNiP 3.04.01-87 “Insulating and finishing coatings”. The temperature of the floor should not exceed the permissible limit, since not only a violation of the condition of the floor structure may occur, but also damage to human health. The permissible surface temperature of heated floors (for floors under normal operating conditions) is no more than 28 °C . At an air temperature of no more than 18ºС.
Recommendations for the use and care of parquet floors
Regular care of your parquet board will extend its service life and allow you to preserve the natural beauty of the wood for as long as possible.
It is necessary to maintain an optimal indoor climate for wood GOST 30494-2011 Indoor microclimate parameters. “Residential and public buildings”:
— air humidity: 40-60%
— room temperature: +18-2 1 ºС
Use soft (felt, felt) heels for the legs of frequently moved pieces of furniture. For armchairs and chairs on casters, use only special rubberized rollers for parquet or polymer mats.
Do not allow water to get on the floor surface (when windows are open or the floor is cleaned excessively wet), and do not use cleaning vacuum cleaners.
Do not carry out work on the floor surface that could damage the floor covering.
It is recommended to wipe varnished floors with a soft cotton cloth, clean them with a hair brush or vacuum cleaner (not detergent). Small dirt and marks from shoes can be removed with a well-wrung out damp cloth. When cleaning varnished floors, do not use abrasive materials, as well as acids and solvents, synthetic surfactants and powdered detergents.
To care for oiled floors, use special oil- or wax-based additives. Add them when cleaning in the amount specified in the instructions for use. Violation of the conditions of use leads to irreparable consequences. Daily cleaning with a vacuum cleaner (not detergent) is recommended. To increase the service life of a parquet floor and preserve its appearance, it is necessary to carry out timely maintenance using special products.
few tips for removing stains on varnished floors :
- asphalt, oil, soot, technical fat. Gasoline galosh.
-mascara, lipstick alcohol and water 1:1
- freeze the chewing gum and scrape it off carefully
Use these products very carefully, as their increased concentration can cause damage!
Product quality and manufacturer's obligations
The manufacturer is not responsible for defects that arise during transportation, storage, installation and operation. In accordance with the Law “On the Protection of Consumer Rights”, the exchange of goods of proper quality is carried out provided that the goods have not been used and their presentation and consumer properties are preserved. Due to the specific nature of wood products, only goods in original packaging can be exchanged!
Only parquet boards found to be of non-conforming quality prior to installation can be returned. The laying worker is responsible for the consequences caused by the use of defective parts, as well as for failure to comply with the “Technology for laying floor coverings.”
THE MANUFACTURER AND SELLER ARE NOT FROM NON-PROFESSIONAL PREPARATION OF THE BASE , LAYING THE FLOOR, AS WELL AS IMPROPER OPERATION OF THE FLOOR COVERING . The information provided in this document is based on current knowledge and practical experience in using the materials when properly stored and used. Due to the inability to control the conditions of use of the material that affect the technological process, the manufacturer does not bear legal or other liability for incorrect use or interpretation of this information. The consumer should always request the latest technical data for specific products, for which information is available upon request. This technical information sheet supersedes all previous technical information sheets.