How to properly attach a sink to a countertop?
- Installation of an overhead washing panel
- Installation of a mortise sink
- Installing an integrated sink flush with the countertop
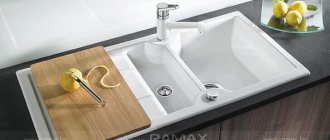
Based on the principle of placement on the underframe, sinks are divided into overhead and built-in. The surface of the washing panel can be located above the plane of the countertop, be flush with it, or be below the level of the desktop. In any case, the bowl under the mixer should be installed between the sections of the set to place dirty dishes and for cooking and serving dishes.
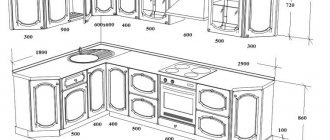
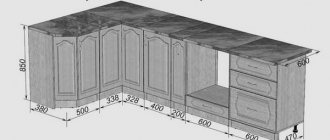
Kitchen sink diagram with dimensions.
The cabinet on which the overhead sink is mounted is often a separate element of the kitchen interior. Mortise and integrated sinks are mounted into the continuous surface of the desktop of the floor-standing modules of the sets.
Installation of an overhead washing panel
Sink connection diagram: 1 – mixer pipe; 2 – gasket; 3 – fixing nut; 4 – flexible hose; 5 – pipeline supply; 6 – overflow hole; 7 – combined drain; 8 – drain device; 9 – compression ring; 10 – compression coupling; 11 – double-turn siphon; 12 – drain pipe.
Overhead types of sinks are easier to install than others. This is the traditional way of installing dishwashing equipment. In the kitchen interior, it is a free-standing cabinet with a sink, complemented by a panel for storing washed kitchen items.
The panel is fixed on the cabinet using fasteners in the form of brackets or is pushed onto the base into the grooves of the cabinet using special slides.
The sink kit may include an adhesive tubular seal that is inserted into a groove on the panel. The joint between the cabinet and the washing panel is coated with silicone sealant to protect against moisture penetration.
Rubber seals do not adhere tightly to the joining surfaces and have a short service life. More often they are replaced with a moisture-resistant sealant; it tightly fills the gaps and retains its properties for a long time when dry.
Attaching the sink to the countertop.
The underframe usually does not have additional internal elements; this provides access for repairing supply pipelines, cleaning the siphon and sewer pipes. Sometimes supporting bars are attached under the overhead sink, reinforcing the strength of the structure.
Before attaching the sink to the countertop, the mixer, water supply hoses and siphon are installed. The overhead sink is secured with L-shaped fasteners with an oblique slot. 4-5 such elements are installed. Self-tapping screws are screwed into the mounting points marked on the inner surface of the cabinet. They should protrude 5 mm from the walls of the underframe. It is better to screw in the screws with a screwdriver; if you use a screwdriver, the tabletop may be damaged.
During installation, the fastening grooves are placed on the screws and the sink is moved until it is firmly fixed to the overhead sink. Then the screws are tightened and the protruding sealant is removed.
Installation of a mortise sink
To prevent water from splashing when washing dishes, choose a deep sink and install a low tap.
The sink is installed in a pre-cut hole in a solid countertop. Moreover, the sink itself can be made of various materials: stainless alloy, earthenware, porcelain, etc.
To insert a washing container, you will need some tools and additional materials:
- jigsaw with a fine-toothed file;
- drill, screwdriver;
- pencil, ruler, tape measure;
- self-tapping screws, silicone sealant;
- wrenches for installing the mixer;
- sandpaper, construction knife.
The contours of the installed panel are marked with a pencil, turning it over and laying it on the countertop. The distances from the front and rear edges of the latter are at least 5 cm. Then the location of the bowl relative to the edges of the panel is measured. The outline of the hole cut for the sink appears along them.
Diagram of a double overhead sink.
The bowl can be of various shapes, so it is necessary to transfer its geometric parameters to the surface of the tabletop as accurately as possible. Manufacturers of mortise sinks often include a template with the kit, according to which the shape of the hole is drawn.
The cutting line should extend outward from the sides of the bowl by about 1 cm. A hole is drilled at one of the points on the contour to insert a jigsaw blade. For a rectangular bowl shape, holes are drilled in the corners of the intended contour.
Painting tape is glued to the outside of the outline. It will protect the surface of the tabletop from damage by the jigsaw foot when cutting. On a removable tabletop, the material is sawn with a jigsaw from the front side, so the surface cladding is less damaged. In the process of cutting the opening, self-tapping screws are screwed into the cut to a small depth so that the inner part does not fall out during operation. The sector to be removed can also be secured from below with support.
The edges of the tabletop along the saw cut are covered with silicone sealant to protect the material from moisture penetration. The sealant is also applied under the edges of the panel along the drawn contour. A sink with a built-in faucet and siphon is inserted into the prepared opening and secured to the countertop with clamps included in the plumbing kit. All that remains is to connect the mixer to the water supply and drain the sink through a siphon to the sewer.
Installing an integrated sink flush with the countertop
Installing the sink flush with the surface of the countertop makes its use more comfortable and improves the aesthetic perception of the structure.
Moisture remaining around the edges of the sink is easier to remove.
Installation of a conventional mortise sink does not require precise processing of the cut, since it is not visible under the panel. For integrated bowls, the edge of the cut opening must be perfectly smooth. He must ensure complete tightness of the connection and a decorative appearance.
In addition to the tool for installing a mortise washing bowl, you will need a manual milling machine and the skills to use it. To process the edge of the opening for the sink, you will need a special rebate cutter for cutting out quarters. To make the correct cut configuration, a template is made from plywood.
The cutout is made in the same way as for a built-in sink, but smaller in size, taking into account the side, which will have to be recessed into the canvas to its entire height. Along the edge of the opening, a fold is selected to a depth equal to the height of the side, and to the corresponding width of the edges of the sink.
The distances are regulated by special stops on the router. The cut surface is thoroughly cleaned. A layer of sealant is applied to the finished shelf and the sink is installed. After the sealant has dried, the sink is secured with clamps.
If you are planning to install a set of separate elements in your kitchen, an underframe with an overhead sink is ideal for you. For a floor furniture module with a solid tabletop, an integrated model will look organic. To install granite, stone and other luxury sinks, it is better to seek help from a specialist.
[content-egg module=GdeSlon template=compare]
Fastenings for modern sinks
The attachment for the sink to the countertop in the case of a built-in model should be as reliable as possible so that the sink bowl is well fixed during installation. This type of mounting hardware greatly simplifies the installation and subsequent disassembly of the sink. We will consider it further.
Features of fasteners and main purpose
Overhead and mortise sinks have almost replaced other models of kitchen sinks due to their practicality, beauty and ease of use. This type of sanitary ware is ideal for installation in non-standard modern countertops, which require maximum integration of all household appliances into the overall ensemble of the interior. Its main feature is that there should be no traces of fasteners, cracks or gaps in the visible areas and on the surface. So, in order to implement this requirement, you will need reliable hidden fasteners that can simultaneously and unnoticeably hold the sink bowl in the countertop.
Fastening device:
- The fastener consists of two main elements and a clamping screw.
- The lower part is attached to special holes or grooves in the sink apron.
- The upper part is cut into the tabletop with special teeth.
- All elements are connected to each other using a screw.
- All parts have a hinge connection; the upper part can be bent relative to the lower one at your discretion. It is thanks to this feature that you can first bend the teeth inward, then insert the shell into the hole, and only after that bend them again and firmly rest them on the board.
Important! Fasteners may consist entirely of metal parts or have plastic inclusions. All-metal clamps are considered the most reliable.
Even if you use an all-metal case, it is recommended to tighten all screws only by hand, because the threads on the washer are too fragile and can be easily torn off with a screwdriver.
Is it possible to install without a clamp?
It happens that fasteners for a kitchen sink are lost during transportation or are simply not the right size for a particular countertop because it is too thick. In such situations, it is difficult to find a way out, but it is still possible.
There are several options to solve this problem:
- Attach the sink using sealant or glue.
- Make your own fastening from parts for installing gypsum boards.
Glue mount
Considering the fact that the sinks are placed on top of the hole and rest on the countertop, we can say with confidence that the entire load falls on the bowl, and under the resulting forces it is pressed even harder. But sometimes a gap appears between the board and the sides. So, if you install the sink on the glue and press it with some weight while it hardens, the gap will be minimal, and the fixation, in turn, will be reliable.
Important! The biggest problem with glue is the inability to easily and quickly dismantle the sink in case of repair or replacement of the faucet.
Fastening for gypsum boards
You can use a remote mount and cut it into several parts. The antennae are simply inserted into the mount on the sink, self-tapping screws are inserted through one of the holes at an angle and pulled to the countertop. Due to this, an attractive force is created, the fastening is durable and reliable.
Important! Screws can only be screwed into tabletops made of wood. Polymer, composite and stone products are completely unsuitable for this method; only the use of dowels is appropriate here.
Types of sinks and options for their mounting
First of all, sinks are divided according to their shape. She may be:
- square - the most popular of them, since such sinks are most convenient to be built into the countertop, especially if they have rounded corners, since they are easier to clean;
- round - it is more compact and takes up little space, so it can be used in a corner version;
- rectangular - another shape popular among buyers; additional wings can be installed on a countertop with such a sink;
- corner - a more expensive sink than the previous ones, which is compensated by its compactness, which is even higher than that of the round one.
Whatever shape you choose, each of them can be overhead, mortise or under-mounted. These, as you already understood, are installation options. Let's look at them in a little more detail.
The invoice is installed on a cabinet separate from the countertop. This is the simplest mounting option, however, it has the disadvantage of a gap between the cabinet and the table, into which water can flow.
Mortise, as the name implies, is built into the countertop. This looks more aesthetically pleasing than the previous option and is generally more convenient, but will require more effort and time to install.
The undermount sink is the most difficult sink to install, but the result is worth it: huge space savings and a modern look. It looks very cool in a high-tech style interior.
Well, we’ve got the general idea, it’s time to get down to business.
Design features of sinks
The sink installation technology has a certain sequence. So, the installation method will differ depending on the type of structure.
Table No. 1. The most popular sink designs
| View, illustration | Description |
| Invoice | This is the most affordable option for the majority of the population. The installation principle is that the sink is attached to a free-standing cabinet, which continues the countertop. This design has an obvious drawback - the insignificant thickness of the sink, which creates a space at the junction with the countertop. This in turn causes inconvenience in operation. |
| Mortise | Such models are installed directly into the tabletop itself, in which a special hole is made. The structure is fixed at the bottom of the tabletop using clamps and brackets. Typically, such products look aesthetically pleasing, they are easy to use, and therefore have gained great popularity. The only downside is the higher cost, but experts advise choosing this type of sink. After all, this installation option practically eliminates the possibility of liquid accumulation between the pipes. |
| Podstolnaya | These are more modern sink models that are quite expensive. Installation of the structure involves fastening it slightly below the tabletop level, which allows you to achieve an aesthetic appearance. Experts are convinced that these products are distinguished by their durability and ease of use. |
In addition to differences in installation, there are differences in the configuration of the sinks themselves. Let's take a closer look at them.
Table No. 2. Various product configurations
| Configuration | Description |
| Square | The most common form, therefore such sinks are often used for installation in standard countertops. The corners of the structures can be either straight or round. The second option is considered more convenient to use. |
| Round | On average, the diameter of such a sink is about 450 millimeters. Compared to the previous type, it takes up much less space on the countertop. Usually the product looks compact, so it is often used for installation in a corner. |
| Rectangular | This is the most popular form of sink, which allows you to install additional wings on the countertop. |
| Corner | A sink of this shape fits perfectly into a corner countertop. As in the previous case, it allows you to install various additional elements. This design is ideal for a small kitchen where it is impossible to place too large a set. One of the disadvantages is that such products often have a higher cost. |
Rules for choosing a kitchen sink
Corner sink
How to attach an undermount sink
A hole is first cut in the table using a jigsaw. Most modern built-in sinks come with a template that makes it easy to transfer the dimensions to the countertop. If you are the “lucky one” who did not get such a template, you will have to arm yourself with a pencil and trace the sink, placing it on the table. The hole dimensions are made 12–14 mm smaller than the size of the sink, since there are special “ears” for fastening on its back side.
Attention! Installation of the mixer, water supply hoses and siphon is carried out before installing the sink, and not after!
It is attached using special clamps or adhesive-sealant. I recommend paying attention to polyurethane silicone, acrylic silicone and elastic silicone. It is especially good if it is designed specifically for plumbing: this means that it will contain special additives against bacteria.
It is easy to glue: clean and wipe the table surface and apply sealant. Place the sink on top, press it down, remove any remaining glue with a dry cloth, and that’s it. The most difficult step in this installation is cutting the hole in the table.
Installation of a countertop washbasin
The choice of a sink model installed on or partially in the countertop directly depends on the size of the bathroom (kitchen). If there is practically no free space, then it is better to choose a washbasin with a small bowl. And if there is enough space, then you can expand in terms of design by choosing a larger and deeper alternative.
Overhead washbasins with a depth of 10–12 cm are compact models. 13–20 cm are medium standard, and 20–30 cm are large washbasins. In terms of width and length, most of these sinks range from 30 to 80 cm. Ideally, the dimensions should be such that when washing, the elbows of your outstretched hands remain within the bowl.
Washbasins with dimensions of around a meter look too bulky; they are recommended to be installed only in spacious rooms where they will look out of place
The process of installing an overhead sink is carried out in four stages:
- Cutting a hole in the table top.
- Installation of the drain pipe and mixer on the washbasin (if it is installed on the washbasin body).
- Placing the sink on the countertop and connecting the siphon.
- Electrical connection for lighting (if necessary).
If the sink is partially recessed into the countertop, then the hole for it should completely coincide in shape and size with the bowl placed inside. The simplest option is a washbasin installed on top of the table. For it, you need to cut a small and round hole with a diameter of only a few centimeters for the drain pipe.
Often, a built-in sink kit comes with a stencil for cutting out the countertop yourself. This greatly simplifies the process; it will be difficult to make a mistake with the sizes. But in any case, it is better to measure and calculate everything several times, and only then start sawing the slab for the washbasin.
Connecting the overhead model to the water supply and sewerage system should not be difficult. This is a regular sink, all connections are made using flexible hoses. The main thing here is that the latter are not visible under the countertop if everything below remains open in a structure without a cabinet or doors. And all pipes must be connected using sealants.
Before the final installation of the bowl in place, the edges of the tabletop where the cut was made are coated with silicone. This will ensure the necessary tightness so that water does not fall down under the washbasin if it accidentally splashes out of it.
At the end of the installation, the power supply is connected and everything is checked for leaks. Models of counter-mounted sinks with LED lighting built into the body are still exotic. But such new items are found in stores more and more often. Their connection does not have any special nuances; all wire connection diagrams are given in the instructions. You just need to follow what is written by the manufacturer.
Mounting an overhead sink
From the inside it looks like a rack profile. And this is what the fastenings to it look like.
First, make markings for each of the fasteners on all sides of the sink.
Screw the screws in as tightly as possible so that the fasteners attach to the wall of the cabinet. Move the sink until it is firmly in place.
Tighten the screw as much as possible. That's all!
How to attach an undermount sink
Remember at the beginning that the exception to the rule was mentioned: “The sink is easy to install”? Here it is. The under-table version will still require experience and appropriate skill, since the installation must be done end-to-end, and this is not so easy. This is the only case in which I recommend contacting a professional. If you are confident in your abilities, you can try at your own risk.
This sink is installed below the table through a seal. On one side, the fastening element grips the countertop, and on the other, the edge of the sink. This is what it looks like:
The entire structure is fixed with screws.
Attention! For a wooden tabletop, a screw is used. If it is made of stone, then it is attached to the sink using a screw and dowel.
There is also a second method, when an under-counter sink is installed in a cutout on the back side of the countertop and filled with polymer resin. It not only attaches the sink to the hole, but also reliably seals the seam, which is then rubbed. When the resin dries, the edge is completely hidden, thus creating the impression of one continuous surface with the tabletop.
When installing a sink yourself, no matter what shape it is, and no matter what method you choose, the main thing is to follow the instructions and not leave anything to chance. Be sure to check that you have all the necessary tools and fixtures. If you do everything right, you can deservedly praise yourself for saving your budget and providing your kitchen or bathroom with one of the most important items.
Installation
The instructions for installing an overhead sink will be the simplest, so let's start our review with that.
It should function according to this scheme:
- To begin with, we set the cabinet-underframe according to the level. The more stable this design is, the easier it will be for us in the future.
- Instead of brackets, it is possible to take wooden blocks with attached iron corners. The sequence of actions in this case will be the same as when using standard fasteners: we install the sink on the screwed bars, which we then press with the corners.
Mortise design
In addition, it is possible to install a mortise structure with your own hands, but here you need to be more careful:
- We attach the template that comes with the bowl to the tabletop.
- We draw marking lines according to the template, and then cut out a piece of wood or MDF along these lines using a jigsaw. To make the cuts more correct, it is possible to first make a couple of holes with a wood drill.
- We apply silicone sealant to the edges of the hole, and lay butyl tape around the perimeter.
- We install the part, carefully smooth it and press it to the lower plane of the tabletop, using iron brackets.
- In addition, if necessary, we drill an additional hole and fix the mount for the mixer to the sink, if its presence is provided for by the design. In most cases, the valve is located at the bottom with a clamping nut.
Wall mounting
In many cases, it becomes necessary to install the sink directly on the wall.
In this case, we proceed like this:
- To begin with, we apply markings on the wall, choosing the optimal height for mounting the bowl.
- After this, we take the brackets (their dimensions must correspond to the dimensions of the product) and apply them to the selected section of the wall. We mark the points where the fasteners will be installed.
- Using a hammer drill, we make holes in the wall. Installation of sink mounts is carried out using anchor bolts with an iron sleeve.
- We install the sink on the brackets, if necessary, fixing it from below with special fasteners. We seal the joint between the wall and the sink.
- Then we attach the siphon, which we disguise using a decorative console: it will also serve as an additional support.
So, we purchased convenient plumbing fixtures that fully meet the owners’ needs in practicality and appearance. By the way, stainless steel sinks are popular for kitchens today. Firstly, they are affordable, light weight, and durable to use.
The universal color “metallic” can be combined with a variety of color schemes in the room.
We suggest you familiarize yourself with How to lubricate house door hinges to prevent them from squeaking, without removing them at home.
Installation is quite simple, there are only two stages:
- Assembling the sink cabinet;
- Installation of an overhead stainless steel sink on a cabinet.
The sink is an indispensable attribute of the kitchen. You can easily install it yourself - you do not need to have special knowledge and skills.
We lay out the tools and accessories in advance so that they are at hand. It is also advisable to decide on the mixer and siphon so that everything is installed at once, otherwise it will be difficult to install later. How to attach a stainless steel sink to a cabinet? This is not difficult if you have already completed the assembly of the frame itself.
- L-shaped fasteners are installed, either included in the kit or purchased separately.
For fastenings, it is better to purchase L-shaped plates with oblique slots at a fastening store. You will need 4-5 plates.
During the assembly process, make sure that all holes are at the same level.
Before installing the overhead sink itself on the base or cabinet and securing it, you need to assemble it completely - secure the siphon and mixer in their places, install gaskets.
This product provides additional fastening of the sink to the cabinet in the kitchen.
The fasteners are placed on self-tapping screws and moved along the slot. This presses the sink against the cabinet.
Take care of the accuracy of the work and reliability.
If water leaks out, the system is assembled incorrectly.
The sink is secured to the cabinet with fasteners and a sealant. This is the most reliable method, quite durable.
So the question of how to install a stainless steel sink on a cabinet has been resolved. If the work is done correctly, it can stand for a long time.
Many people attach the sink to the countertop. There are options when, when ordering kitchen furniture, the need for a hole in the countertop for installing plumbing is specified. Then there will be little work involved in installing the sink.
If there is no specially allocated space on the countertop, then you will have to do everything yourself.
- Mark the contours on the surface with a pencil. Take into account the margins from the edges (5 cm). Take measurements for the bowl.
Remember that the gap from the edge of the countertop to the side of the sink must exceed 50 mm. If this distance is less than 50 cm, then the sink needs to be deepened.
To make a hole in the tabletop you will need an electric jigsaw.
To avoid chipping on the front surface, choose the opposite direction of the tooth.
Stepping back a couple of millimeters from the edge of the hole, we apply the silicone in a thickness just above the side of the sink.
The sink needs to be inserted into the hole and the edges should be pressed firmly so that the silicone strands take the shape of the sink and left for a few minutes.
So, having looked at how to attach a stainless steel sink to a cabinet with fasteners and to a countertop, you will notice that doing this is not as difficult as it seems.
The most difficult thing is to make the hole correctly. If it turns out to be larger than expected, the paws will not be able to hold the sink.
Mounting a mortise sink
Let me remind you that a mortise sink is installed with a specially made hole in the countertop. The hole dimensions are made 12-14 mm smaller than the overall dimensions of the sink.
This indentation is made for a reason. There are special “ears” on the back side of the mortise sink, which serve to secure it.
Look at the photo for the appearance of the mounting of a mortise sink. In the photo I marked the purposes of the fastening elements:
- — clings to the “ear” at the sink;
- — Fastening screw;
Reliable fastening of a mortise sink
- clings to the countertop.
Important! The fastening clips are installed in the “ears” of the sink before it is installed.
- Turn the sink upside down;
- Install the fastener at the “ear”, observing the correct location of the catching “whiskers”;
- Bend the tightening part of the fastener so that it does not interfere with installation;
Follow all the rules for waterproofing: treat the cut of the sink with acrylic sealant, insert the sealant, which should be included, into the groove of the sink. Install a faucet on the sink.
- Install the assembled sink into the hole;
- Unfold the catching element of the fastener and hook it onto the back edge of the tabletop;
- Use a screwdriver to tighten the fastening screws.
Important! Tighten the fastening screws not immediately, but in a circle. It is even better to tighten the screws according to this pattern. With this tightening, there will be no distortions in the tabletop and it will be evenly attracted to the tabletop by the distorted seal.
Built-in sink: installation process
Let's consider a method for installing a mortise-type sink into a countertop made of chipboard with a protective polymer coating.
Video - Installation of a sink in a countertop, fasteners
Tools and materials
Before you begin installation work, you must prepare the following materials and tools:
- fastening elements: clips that are attached to the bottom of the sink and to the inside of the countertop, a seal that performs the function of sealing the joints (usually the fasteners are included with the sink);
- electric jigsaw or hand saw;
- drill;
- drill;
- self-tapping screws;
- measuring instruments: tape measure, building level, corner, screwdriver, knife, pencil and ruler;
- silicone sealant.
Prices for silicone sealant
Silicone sealant
Step-by-step instruction
Step 1. Make the markings. In this case, we will install a standard rectangular sink. To do this, you will need to apply markings to the surface of the countertop using a simple pencil. It is necessary to mark all perpendicular lines at the intersection of which the drain hole will be located.
Then you need to turn the sink over, place it on the countertop and align the previously marked marks. The sink should not create an obstacle to the door, so it is secured by stepping back a few centimeters from the edge.
It is convenient to take measurements with a water felt-tip pen
Then you need to measure the width of the sides of the sink in order to mark the cutting lines. This value may vary depending on the type of product, but on average it is about 1.2 centimeters.
Step 2. Cut a hole in the tabletop. It is necessary to make a hole in the corner parts of the internal markings using an electric jigsaw or a hand saw. In order to avoid the appearance of various chips and scratches, you should cut only from the front side. This will allow you to control the progress of work.
After the corner holes are ready, you should make a cut along the inside line. The cut-out tabletop must be screwed onto the screws so that it does not fall. Upon completion of all work, it is necessary to remove the screws along with a fragment of the table top and thoroughly clean the cut from any remaining dust. Then you will need to try the sink on this hole to eliminate mistakes.
Fitting
The sink should fit into the prepared hole without any obstacles. If this does not happen, then you should again process the edges with a jigsaw.
Step 3. Process the cut. In the process of preparing the hole for attaching the sink, various chips and cut damage often remain. This is why additional treatment is required, because the lack of normal sealing leads to water getting into the cut of the countertop, which is why fungi begin to form on its surface. Over time, the wood will rot and then become brittle, which will undoubtedly affect the stability of the sink.
You can avoid such consequences by sanding the edge of the cut with sandpaper, and then carefully treating it with a special sealant for plumbing. It is advisable to use a spatula for such purposes, but if you don’t have one, you can do this with your hands (wearing rubber gloves). Such measures help prevent deformation of the tabletop.
Treatment with PVA glue
There is another equally effective way to process a cut - using PVA glue. It must be applied to the prepared cut surface and left for several hours.
Next you need to glue the seal. It should be applied along the edges of the sink, and the residue can be removed with a knife. If you skip this preparation step, water will leak into the hole, causing the wood to quickly swell. For such purposes, you can use a sealant in a tube, which is foamed polyethylene.
Some craftsmen prefer to stick a tape seal along the sides of the sink
Step 4. Attach the sink to the countertop from below. A mortise sink is attached to a hole in the countertop; its dimensions should be 1.2-1.4 centimeters smaller than the structure itself. This indentation is necessary because there are special protrusions on the bottom side of the sink, which act as fasteners.
Fasteners should be located on all sides of the sink at an equal distance from each other. During the process of tightening the fasteners on the screws, it is necessary to constantly monitor the position of the sink relative to the markings. For such purposes, it is better to use a screwdriver, otherwise the screwdriver can damage the plastic surface. In order for the fastening spikes to tightly connect to the surface, they can be pre-sharpened.
Once installation is complete, remove any remaining sealant.
Step 5. Connecting communications. To do this, hoses with hot and cold water should be connected to the water supply system using seals.
Installation of seals
Step 6. Next, you need to insert the siphon outlet into the sink, adding a pipe to it, after which it will need to be discharged into the sewer. Finally, you should once again check the strength of all fasteners.
Siphon connection
Collection of communication pipes
Video - Installing a mixer
Mounting an overhead sink
The overhead sink is NOT installed on the countertop, but is placed on a special kitchen floor cabinet. The cabinet and sink are selected strictly according to size.
If you look at the back of the overhead sink, you will see that the edges of the sink have a U-shaped profile. It will serve as a shelf for attaching fasteners.
You can see the mounting option for the overhead sink in the photo. The fastener itself is visually simple.
- The sink is placed on the cabinet and aligned along the edges;
- From the inside of the cabinet, the fasteners cling to the sink shelf;
- The second edge of the fastener is screwed to the cabinet walls. Watch the length of the screws so that they do not come out of the cabinet walls.
The sink is fastened from four corners of the sink, which may require “acrobatic” skills. When installing an overhead sink, do not forget to install the faucet on the sink in advance.
Attaching an undermount sink
Installing an undermount sink requires a separate article; here I will show only the option for mounting it. The fastener for an undermount sink looks like this.
The sink is installed under the countertop through a seal. Then it’s simple, the fasteners are installed so that one side clings to the sink, and the other side rests against the countertop.
The sink is secured with a fastening screw, which screws the fastener to the back of the countertop. For a countertop made of chipboard, this should be a screw; for a sink made of stone, it should be a screw with a dowel.
undermount sink mounting diagram
