Installation of heating from polypropylene pipes is carried out by diffusion welding of pipes and fittings using a special heating tool - a soldering iron.
A heating system made of polypropylene pipes requires one-time installation, that is, it is non-removable.
The marking of such pipes includes the abbreviation “PP” for domestically produced products or “PN” for international markets.
Let's consider what types of pipes exist and are suitable for use in heating systems.
The market for polypropylene pipes today is saturated with products from various manufacturers intended for use in various communications. To navigate this diversity, let’s consider their main types.
Categories of polypropylene pipes
| Marking | Design features | Scope of application | Maximum operating temperature, C | Nominal pressure, MPa |
| PN10 | Thin-walled pipe | Cold water supply | +20оС | 1 MPa (10.2 kg/cm2) |
| Underfloor heating systems | +45оС | 1 MPa (10.2 kg/cm2) | ||
| PN20 | Universal pipe | Hot water supply | +80оС | 2 MPa (20.4 kg/cm2) |
| PN25 | Aluminum foil reinforced pipe | Hot water supply and central heating with polypropylene | +95оС | 2.5 MPa (25.49 kg/cm2) |
| PN16 (rare variant) | +60оС | 1.6 MPa (16.32 kg/cm2) |
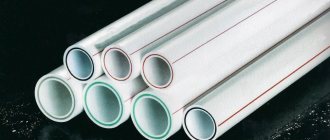
Solid polypropylene pipes
Polypropylene pipes for heating external diameters:
- PN10: 20, 25, 32, 40, 50, 63, 75, 90, 110 mm;
- PN20: 16, 20, 25, 32, 40, 50, 63, 75, 90, 110 mm:
- PN25: 20, 25, 32, 40, 50, 63, 75 mm.
Reinforced polypropylene pipes for heating PN25 have a layer of aluminum foil or fiberglass.
Color palette of polypropylene pipes: white and grey, green and black (UV protection).
Polypropylene pipes for heating: types, characteristics, properties
More recently, when installing heating systems, they began to use pipes made of ordinary polypropylene, or, as they are also called, PPR pipes. However, over time it became clear that this material was not entirely suitable for these purposes. Under the influence of pressure and high temperatures, PPR heating pipes became very susceptible to deformation.
And their service life ended up being much shorter than what the manufacturers indicated. An excellent solution was a kind of modernization of these pipes - the use of reinforcement technology in their production. This made it possible to correct existing shortcomings while maintaining all the advantages of polypropylene products.
Fittings for polypropylene pipes
Fittings for polypropylene pipes
A heating system made of polypropylene pipes is mounted using fittings of various configurations, which both connect propylene pipes for heating to each other and connect the metal parts of the system pipeline with polypropylene units.
| Coupling with internal (external) thread, Designed for connecting a polypropylene pipeline with metal pipes. | |
| Straight coupling and elbow (90O and 45O). Designed for connecting pipes to each other | |
| Elbow with internal (external) thread. Designed for connecting a polypropylene pipeline with metal pipes. | |
| Tee and crosspiece. Designed for connecting polypropylene pipes to each other. | |
| Tee with internal (external) thread | |
| Elbow with thread and strip for fastening to the wall (water socket). Designed for connecting a tap or mixer. | |
| Tubular “bypass”. Designed to bypass perpendicular pipes when heating a private house made of polypropylene is installed. | |
| Filter - “mud collector” for coarse cleaning | |
| Ball valve for heating systems | |
| Through valve | |
| Detachable coupling with internal thread for polypropylene pipes |
Heating scheme for a private house
Heating system control unit
Before starting installation work with your own hands, you initially think through the entire heating system of a private house on polypropylene, where you must take into account the location:
- boiler;
- radiators;
- expansion tank;
- pipe routing.
In a large private house, a special room is usually allocated for installing a boiler if the design of the heating equipment involves the removal of combustion products naturally, through a chimney.
The walls of the mini-boiler room are covered with protective fireproof material, which prevents the spread of flame in the event of a sudden fire. In addition to the chimney, the arrangement of this room must meet all fire safety requirements.
The length of polypropylene pipes is calculated taking into account:
- size of rooms;
- turns;
- connections;
- piers;
- floor.
The heating scheme for a private house using propylene can be done with your own hands using one of two main options.
- With top coolant supply. In this case, the coolant circulates independently inside the pipeline, which is very convenient in case of unexpected failures in the electrical network.
- With bottom coolant supply. In such a system, the coolant will circulate through the pipelines thanks to a pressure pump. Here, the constructive wiring of polypropylene pipes can be done by hand with various necessary bending and connection options. A system with bottom coolant supply works very well in private multi-storey buildings.
Connection of polypropylene pipes
Connection to a metal pipe of a heating system made of polypropylene pipes
You can install heating with polypropylene pipes yourself, provided you know how to weld polypropylene pipes. As a last resort, the minimum requirement for installing polypropylene heating is a “huge” desire to learn how to weld such pipes and fittings.
Types of welding:
- coupling (socket) welding - used when welding two pipes with a diameter of up to 63 mm using a third element - a coupling;
- butt - used for butt welding of large diameter pipes and involves the use of special centering equipment
Sleeve welding of polypropylene parts
Polypropylene heating is usually installed using a manual device for welding polypropylene pipes, which has special attachments: a sleeve and a mandrel.
The sleeve is designed to heat and melt the outer surface of the end of the pipe, and the mandrel is used to heat and melt the internal socket of the connecting element (coupling).
The diameters of such nozzles must correspond to the diameters of the pipes being welded, and their surface has a Teflon coating, which provides a non-stick effect.
Machine for welding polypropylene pipes
Attention! During the installation of heating systems made of polypropylene pipes, it is necessary to ensure the cleanliness of the surfaces of the heating nozzles, and, if necessary, clean them with wooden sticks from adhered fragments of polypropylene.
Important! The surfaces of the nozzles can only be cleaned when they are hot!
Welding elements with Teflon coating
To work, the necessary attachments are installed on the welding machine, and it is placed on a flat surface for “stationary” welding.
Welding process
If it is necessary to perform work “on the wall,” the attachments are attached to the edge of the heating element of the soldering iron.
For polypropylene pipes, the optimal welding temperature is 260°C. Before starting work, the device must be warmed up for 10-15 minutes.
Attention! It is contraindicated to weld polypropylene pipes at ambient temperatures below 0 °C.
Socket welding of parts to each other is carried out in the following sequence:
Use a pipe cutter or scissors to cut the pipe at a right angle.
If the end of the pipe or fitting is dirty, clean it, degrease it with soapy water or alcohol and dry it.
If PN 10 or PN 20 pipes are welded, then we skip this step and immediately move on to the 4th.
Pipe cutter
To weld reinforced pipes of type PN 25, you must first remove the top two layers with a special tool - a shaver: polypropylene and aluminum. The depth of stripping is determined by the depth of the bell seat. Often it corresponds to the depth of processing of the pipe with a shaver.
The shaver is designed for stripping reinforced polypropylene pipes
Stripping reinforced polypropylene pipe
Heating parts on a “soldering iron”
We place the parts to be welded on the heating elements. Heating of the parts being connected occurs simultaneously.
Connecting heated parts
After heating, remove them from the nozzles and quickly connect them without turning them along the axis.
Connecting
Allow some time for the polymer to harden and cool. Any deformation of the joint during the cooling period is unacceptable.
Attention! If you get an unsuccessful connection, there is only one way to fix it - cutting out the fitting and welding a new one.
Pay attention to the correct positioning when welding ball valves - they have a rotary handle, which in no case should “rest” against a wall or other neighboring object.
We check the appearance of the welded joint, which must meet the following requirements:
- Significant misalignment of pipes is not allowed;
- the surface of the socket (coupling) must not have cracks or other defects;
- near the edge of the coupling of the part welded to the pipe, a continuous strip should be visible, located along the entire circumference of the bead of melted material, which should protrude beyond the end surface of the connecting part.
Welding location in section
Welded tee in section
Butt welding
Equipment for butt welding
Butt welding is performed using special equipment and is used for polypropylene pipes with a wall thickness of more than 4 mm and a diameter of 50 mm or more. We will not consider this issue in detail in the context of this article.
Step by step guide
Work on installing polypropylene heating begins with bringing the pipes inside the room to “acclimatize” them and eliminate the consequences of expansion or contraction in the heat or severe frost.
Article on the topic: Problems in the heating system
The main work when connecting pipes is welding polypropylene (solder). For these purposes, you should choose a soldering iron. The process itself does not take much time and is simple. The main thing is to quickly connect the heated ends of the elements, being careful not to overheat them. The duration of heating depends on the diameter of the pipe. The larger it is, the longer the heating should be. The cross-section of the soldering device nozzle must correspond to the diameter of the pipe.
Pipe soldering technology
Step-by-step instructions for assembling the heating pipeline are as follows
:
- a wiring diagram is drawn up;
- Markings are made on the walls for all areas, following which the elements of the heating system will be laid;
- fittings are selected;
- the time allocated for installation and welding work is determined;
- pipes are marked and cut into sections of a certain length, the cut is made at right angles to the axis;
- to degrease and remove dust microparticles, the ends are wiped with alcohol, the dust is removed with a dry, clean cloth;
- the soldering iron nozzle is degreased, placed in the working position and heated to +265 °C;
- a fitting and a pipe are placed in the nozzle, they are heated together and connected to each other;
- After waiting the necessary time for cooling, the connected section is attached to the wall using clips.
Do-it-yourself polypropylene heating also requires the installation of control equipment, a boiler, heating devices, an expansion tank, and a pump. Their installation is carried out according to the instructions and recommendations of the manufacturer.
Welding polypropylene pipes and your health
When welding work with polypropylene pipes, for greater safety of your health, you must follow a number of the following rules:
- carry out work in a ventilated area;
- remember that a welding tool is a power tool that requires compliance with safety precautions when working with it;
- do not allow polypropylene to come into contact with open fire, which can cause the formation of a melt with the release of carbon dioxide, water and other gaseous products that are far from useful for human inhalation.
Installation work
Installation of a two-pipe system
Installing a home heating system on polypropylene with your own hands initially involves a thorough study of this issue and selection of a suitable option.
The best option for arranging a private home would be to choose a hydraulic system, since water is the best coolant.
When choosing a boiler, you need to focus on a cheap type of fuel. The best option for him would be gas if a gas pipeline is connected to the house. If you use an electric boiler, the cost of heating your home will be significantly higher than with a gas boiler. In addition, you will need to additionally lay a special high-power cable here. In the absence of gas and electricity, all that remains is to make a choice in favor of a liquid fuel or solid fuel boiler.
When selecting heating radiators, it is better to choose aluminum ones. They heat up quickly, dissipate heat well, and have an excellent appearance.
The best wiring system would be a two-pipe one with forced circulation. It makes heating in a private home comfortable and allows you to regulate the temperature in the rooms.
Tools and materials
After purchasing equipment and pipes made of polypropylene of various diameters, you need to have a set of tools in the form of:
- Scissors for cutting polypropylene pipes.
- Jigsaw with a set of attachments.
- Perforator for punching walls.
- Markers and tape measures.
- Shweider or trimmer.
- Pipe wall mounting elements.
- Set of connecting fittings.
The nuances of working with polypropylene
Soldering polypropylene pipes
When starting to install a heating system in a private house using polypropylene with your own hands, you need to consider some subtleties.
- Polypropylene pipes for installation must be prepared for cutting after large equipment in the form of a boiler, water heater, heating radiators, and expansion tank has been installed.
- Polypropylene pipes must be cut into separate pieces only using special scissors or a sharp knife, while maintaining a right cutting angle of 90 degrees.
- By installing additional holders into the heating system, you can eliminate sagging material and ensure reliable fastening.
- You can work with polypropylene pipes at room temperatures above 5 degrees Celsius.
- Using fum tape, you can increase the reliability and quality of fitting connections.
- Before using the welding device, it must be warmed up to the required temperature.
- When working with polypropylene pipes, their cut reinforced edges must be cleaned of protruding remnants of the metal shell. To do this, you can use a trimmer or a special scraper to remove part of the inner shell and get a flat surface.
- The edges of the connecting pieces are heated using a special welding machine at a temperature of 250 degrees, depending on the diameter of the pipe, for 5 to 20 seconds, and then immediately joined together.
- The joining of two parts after heating should be carried out evenly and tightly enough so that later, during operation, unpleasant problems do not arise.
- Parts fastened by soldering must lie motionless until completely hardened for three minutes.
Welding saddles to the finished heating system pipeline
Welding the saddle
If, after completing installation work or when repairing an existing heating system, it becomes necessary to create any additional branch from the pipeline, you can use the method of welding saddles. This method is also used to connect a smaller diameter pipeline without special adapters to a larger diameter pipeline.
A distinction is made between a welded seat and a welded seat.
Weld-on seat Weld-on polypropylene seat
Installation of a welded seat involves the use of a special drill-mill to prepare the seat
Welded seat cutter
The process of welding or welding the seat:
- Preparation of welded surfaces: clean, grease-free, dry.
- A seat is prepared for the welded seat using a milling cutter. In the case of installing a fitting to an aluminum-reinforced polypropylene pipe, it is necessary to “go through” the foil layer with a cutter to ensure a larger contact area of the surfaces being welded.
- Warming up the welding machine to a temperature of 260°C.
The process of properly welding such elements involves the use of special semicircular heating sleeves on the welding machine.
Sleeves for a welding machine for welding in a saddle
Their absence may create additional difficulties during installation, but with some skill you can heat up the surfaces to be welded with ordinary nozzles of a suitable diameter, although... Who will guarantee the quality of the connection?
- Heating of the pipe surface continues for approximately 25-30 s, while at the same time (about 20 s) the surface of the welded seat is heated.
- Having removed the welding tool, quickly press the saddle against the heated section of the pipe in one motion and fix the connection for 30 s. After 7-10 minutes this saddle is suitable for further “assembly operation”.
- If a welded seat is used, after its installation, it is necessary to drill a hole in the pipe at the landing site using a twist drill of a suitable diameter. In this case, it is necessary to avoid chips getting into the pipe, and also control the drilling depth so as not to damage the opposite wall of the pipe.
Nuances of installing a heating system
Since the appearance of propylene on the heating equipment market, the process of organizing intra-house communications has become much simpler and cheaper. Unlike metal pipes, a pipeline made of polypropylene consumables is 3-5 times cheaper. Moreover, due to the affordable cost of products, you no longer have to save on the length of communication lines.
Laying heating circuit pipes using propylene products allows you to equip full-fledged home heating, which can heat all living spaces. The low cost of propylene consumables is the result of the low cost of the production process. However, this is not all the advantages that polymer consumables have. Let's look at some other important aspects. For example, polypropylene pipes are:
- resistance to high temperatures;
- good resistance to mechanical loads;
- resistance to corrosion processes;
- high performance characteristics;
- long service life;
- environmental Safety.
Of all the above, it is especially worth highlighting the heat resistance of polypropylene. The material begins to change its structure and shape only at very high temperatures. When reaching 1400C, the plasticity of the material increases. Polypropylene easily changes shape. At around 1750C, polypropylene begins to melt.
The addition of certain stabilizers to the polymer composition makes propylene pipes resistant to corrosion, aggressive environments, and dynamic loads. Due to these components, the service life of propylene pipelines is significantly increased.
Polypropylene is highly water resistant, which makes it possible to use pipes made from this material when laying liquid communications, including water supply and heating circuits.
Despite a lot of positive properties and characteristics, polypropylene pipes have one drawback, which, if the installation technology is not followed, can negatively affect the condition of the pipeline. We are talking about a high coefficient of thermal expansion. This aspect must be taken into account when choosing consumables for the heating circuit.
Thanks to these qualities and properties of polymers, polypropylene pipes have become an excellent alternative to the use of metal consumables and metal-plastic products. The only condition that will allow you to make the most of all the positive qualities of polypropylene pipes is the correct installation of heating.
Installing heating from propylene pipes is not a complicated process, however, it contains certain subtleties, features and nuances. Every little detail must be taken into account, otherwise your heating will work intermittently, and the hot water pipeline will be a source of additional hassle.
All work begins only after carefully drawing up a heating scheme. Based on the working diagram, the type and quantity of consumables, the presence of fittings, pipe diameter and installation methods are determined.
Another equally important point that determines the functionality of the heating main is the choice of products. For heating equipment, you can only use reinforced polypropylene pipes, which have a low coefficient of thermal expansion. For multi-layer consumables these values are 0.03 mm/m0C, while for conventional, unreinforced, single-layer products the coefficient is 0.15 mm/m0C.
In other words, the following happens. Ordinary propylene begins to change shape over time when exposed to high temperatures. A single-layer pipe becomes plastic, losing its linearity. Thermal linear extension is triggered, as a result of which the pipeline begins to sag over extended sections and takes on an unsightly appearance. No such defects are observed in heating pipes reinforced with aluminum or fiberglass.
Practical details that should be observed during the installation process are as follows:
- It is not recommended to connect polypropylene pipes directly to heating devices;
- monitor the operation of the autonomous boiler, preventing the coolant from boiling.
In order to avoid such situations, when connecting the polypropylene line to the boiler, use metal adapters or other devices and equipment. Equip your heating system with automated heating temperature controllers.
At the moment, in practical terms, two options for laying out the heating circuit using polypropylene consumables deserve attention.
Installation of propylene pipes with top connection. This option is designed for operation of a single-circuit heating system in which there is no circulation pump. The coolant in the pipeline is supplied by gravity, due to the existing pressure difference, at the top point and at the bottom (in an autonomous system). In city apartments, pressure in the riser is created by the operation of house circulation pumps.
Typically, such installation and connection schemes are used in small residential buildings and dachas, where systematic heating operation is not expected, as well as in apartment buildings where the batteries are connected in the main pipe or to the return pipe.
Laying pipes with bottom supply and radial connection of heating sources. This is an extensive double-circuit heating system, in which the installation of additional equipment is expected. Coolant circulation is carried out in a forced manner (for autonomous heating systems).
The second option is quite common and is more convenient for subsequent operation of the heating system. The pipeline can be laid in almost all residential premises, taking into account the layout of the interior. Due to polypropylene pipes, the required length of lines is achieved and convenient connection of batteries is ensured.
The cross-section of the pipeline depends on the heating scheme in a private house made of polypropylene pipes. If you plan to make heating in a private house from polypropylene pipes without a pump (installing a pump in the heating system of a private house), the diameter should be chosen larger: the absence of artificial injection of coolant in the system is compensated by an increase in the volume of passing water.
Since the connection of polypropylene pipes with metal ones during the installation process is inevitable, and in some cases it is necessary to connect them with metal-plastic ones.
Please note the standard diameter combinations:
- metal-plastic 2 cm (section) by 2 mm (wall thickness) - polypropylene 2.5 (outer diameter) by 4.2;
- metal-plastic 1.6 by 2 – PP 2 by 3.4;
- metal 2.6 by 3 – PP 3.2 by 5.4.
We suggest you familiarize yourself with How to connect a heating coil in a bathroom
If the distribution is two-pipe from the main line, a 2 by 3.4 PP pipe is used. For heating systems, pipes with a cross-section from 1.6 centimeters to 11 are used, control valves for batteries - up to 1.2 inches.
The maximum length of the circuit at which heating is effective is 25 meters with a boiler power of up to 12 kilowatts. With a pipe size of 2 by 3.4, such a circuit serves 6 radiators of 10 sections each. If a larger length is required, the pipe cross-section can be increased to 3.2 by 5.4. But it is better to make a second circuit or use beam routing (see below).
Table of sizes of polypropylene pipes for heating.
Directly near the batteries, thinner pipes are used than in the main line. Connections are made using “American” ones.
In order for radiators to heat evenly, it is necessary to correctly calculate heat losses and reduce them. Otherwise, the system will not cope. After all, the diameter of the heating pipe affects the hydrodynamics of the system. Let's figure out how to choose the right section.
Some people think that if you increase the diameter of the heating pipe, the efficiency of the system will increase proportionally, but this is not so. After all, when such wiring operates, the operating pressure decreases and the batteries stop heating. Therefore, let’s look at how to calculate the diameter of polypropylene pipes and what characteristics affect it.
- internal and external section;
- nominal diameter (measured in inches).
First, calculate the diameter of the pipes for a room of 25 m².
Different diameters of heating pipes made of different materials
To do this, find out the amount of required thermal power, provided that for an area of 10 m² it should be 1 kW. This means that the initial premises will require 2.5 kW.
An 8 mm polypropylene pipe is suitable for this, and if the room has windows, then purchase 2 radiators with a power of up to 1.5 kW.
To equip it yourself, carefully study all the options and select suitable radiators and wiring. It is better to choose a hydraulic system with two-pipe forced circulation and aluminum batteries, which heat up quickly and cool down for a long time.
Diagram for installing a heating system
Pipes for installation.
Marking of ppr pipes
Installation. Primary requirements
During the installation process, adhere to the following recommendations:
- cutting pipes into separate fragments and pieces is carried out only using special scissors;
- cut strictly at an angle of 90;
- do not make too long continuous sections of the heating circuit, avoid excessive bends in the working line;
- it is necessary to have a sufficient number of holders and fasteners for pipes on hand, thereby ensuring the stability of the entire pipeline, eliminating the effect of sagging;
- before connecting segments and fragments, check the edges and internal diameter for contamination;
- installation is carried out only at positive air temperatures, not lower than 5C.
When laying the heating main with polypropylene pipes, it is important to maintain the integrity of the consumable material. Avoid mechanical damage to pipes, which will later form the basis of the pipeline.
Cleaning of reinforced aluminum pipes is mandatory. Aluminum cannot be soldered, so use a shaver to remove excess aluminum to a depth of 1-2 mm. This guarantees the necessary strength and tightness of the connection during the soldering process.
We invite you to familiarize yourself with Pipes in a groove in the bathroom
To create a threaded connection, special fittings are used, products that already have a cut thread.
During the soldering process, the soldering iron heats up to a temperature of 2600C. It is not recommended to heat the soldering iron any more or less. Otherwise, the polypropylene may overheat or, conversely, the required joint strength may not be achieved. No further installation should be carried out immediately after soldering. Within 3-5 minutes, the soldered joint should be in a quiet position.
Once installation is complete. The entire heating system is checked for functionality during a test run. The water temperature is not brought to the optimal temperature immediately, but over several days, thereby increasing the load, operating pressure and coolant supply rate. During the test run, all connections and connections to the radiators are checked.