In this article I will talk about the main pros and cons of a hygienic shower in the toilet, its varieties. I will introduce you to the types of faucets, materials of manufacture and ratings. I will separately touch on the issue of proper installation of a hygienic shower for the toilet. I will conduct a short review of the most famous manufacturers on the plumbing market and tell you how to choose a faucet.
When arranging a bathroom, we strive to bring maximum comfort to it so that hygiene procedures are easy and comfortable. One of the devices that serves hygiene is the bidet. However, in our country, the layout of most apartments and houses has very modest bathroom sizes and there is simply nowhere to build it in. The solution in such a situation would be a hygienic shower for the toilet.
Pros and cons of a hygienic shower, toilet bidet
Compared to a traditional bidet, a hygienic toilet shower has many advantages:
- Compactness - this device takes up virtually no space in the bathroom, so it can be installed even in a very tiny room;
Doesn't take up much space
- Multifunctionality - thanks to its design, such a shower can be used not only for its intended purpose, but also as an additional source of water. Using it, it is easy to draw water into a bucket and wash containers (for example, a cat litter box).
The shower is useful for collecting water in a bucket and for washing shoes.
- Affordable price - such a shower costs much less than a full-fledged bidet. Its installation will also be cheaper, since there is no need for a separate structure for drainage.
- Saving water means that when using a shower, you yourself control the pressure and flow of liquid using a mixer.
You should also pay attention to some disadvantages of this device:
- When installing a hygienic shower for a toilet, you will still have to dismantle part of the wall decoration in the bathroom in order to hide the hoses for the water supply;
- For comfortable operation of such a device, a stable water pressure is required. If there are problems with this, you will have to purchase a thermostat.
It is better to hide pipes supplying water in the wall
Advantages of installing a hygienic shower with a thermostat on a sink
A sink combined with a hygienic shower is undoubtedly the most acceptable plumbing option.
This hygienic shower with a thermostat has the following advantages:
- convenience;
- increased security;
- comfort;
- originality;
- possibility of installing a shower with spout;
- presence of a thermostat;
- preventing leaks or flooding.
This type of hygienic shower can be equipped with a mini-sink for small spaces and has significant advantages over classic bidets in terms of functionality.
The mixer in this case not only has a lever and a spout, but may also have an additional outlet for mixed water. A flexible hose for a hygienic shower is usually attached to it. The principle of operation of such a mixer is the most traditional. When the tap is opened, water flows to the sink through the spout. If you press the lock button on the handle of the shower head, the pressure will be redirected to the shower.
The main advantage of this design is that the hygienic shower will always be closed while it is not in use. It will be difficult to forget the water turned on when leaving the toilet.
Types of shower for toilet
According to their configuration and features of the device, there are several types of hygienic showers.
Bidet toilet. To avoid the need to purchase and install a bidet bowl, many people purchase a toilet with a built-in bidet function.
Bidet is difficult to install, but easy to use
This is a traditional toilet with a built-in hot and cold water supply. Due to the built-in control unit, its dimensions are larger than those of a conventional toilet. Also, such devices are more difficult to install and more expensive.
Shower toilet
The bidet lid turns an ordinary toilet into a high-tech device for comfortable hygiene procedures. A mixer for supplying cold and hot water, a dryer, and a control unit are built into this cover.
Bidet lid
Wall-mounted shower. Next to the toilet there is a water supply mixer with a hose and a watering can.
Shower with water supply from a pipe in the wall
Shower connected under the sink. The design is convenient if the toilet is located in close proximity to the sink. In this case, a special device with three outputs is used as a mixer.
Shower connected to sink
All that is needed for such a shower is to install a special mixer and install a holder for a watering can into the wall.
When choosing a specimen belonging to the last two types, make sure that the watering can is narrow. This shape will provide a point pressure and prevent splashing.
Hygienic shower in the toilet: main types
At the moment you can see several shower models presented in specialized stores. These types each have their own characteristics and features of use. The connection of such a shower can be either hidden, that is, in the wall, or in a visible place. If a hidden connection breaks down, it must be removed from the wall, which implies its dismantling.
There are 3 options for a hygienic shower:
- One option is wall-mounted. This option is very easy in design and installation. When installing, the mixer is placed on the pipes, and only a watering can, a flexible hose and a holder remain outside. It is the flexible hose that makes control easy.
- Shower for hygiene with sink. The working process is to open the tap and water flows into the faucet spout, where the water will remain until used.
- Bidet toilet. This device is multifunctional and looks like a regular toilet, but is equipped with nozzles that supply water. The nozzle must have a retractable mechanism and a power button. Often such a button is placed on the rim of the toilet.
Before you get such a mini washer, decide what size you need, where the base itself and the tube will be located. It is not uncommon for a built-in sanitary shower to be accompanied by a sink. This shower installation will fit perfectly into the interior. Anyone can connect a shower, and anyone, a girl, a man, or even a child, can use this shower to wash themselves. It is called built-in because it does not need to be hung on the wall, it takes its position in it. All you have to do is connect it correctly and use the button to get started.
All work on installing the meter can be done independently, without waiting for specialists. All the subtleties and stages of work are in the following material:
Types of faucets for hygienic showers
The following types of mixers are used for hygienic showers:
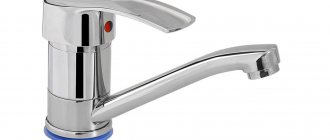
- Valve is the simplest, most common and inexpensive type of faucet. It is usually installed on a hygienic shower connected to a washbasin. It is inconvenient because the water temperature will have to be adjusted using a faucet on the sink.
Valve option
- The lever mixer is very comfortable to use, since using the lever you can control the temperature and water pressure.
Lever model
- Mixer-thermostat - this device maintains a constant temperature and water pressure, regardless of surges in the system. These types of mixers are very expensive.
Faucet with built-in thermostat
How to install a hygienic shower for a toilet with a thermostat
The device is installed on the wall near the toilet. If a hygienic shower with a thermostat will be installed after the renovation is completed, you should think in advance about what its design will be. That is, initially ensure the presence of this plumbing fixture in your toilet. This type of wall-mounted shower can be installed without additional structures.
If no changes are planned in the room, you will have to install a special cabinet to adjust the plumbing. This method is not very convenient, since regulating the temperature in the bidet or sink spout will require constant opening of this cabinet. A hygienic shower with a wall-mounted thermostat that regulates the water automatically will help get rid of this problem.
In order for the installation of a hygienic shower to be carried out correctly, it is important to correctly determine the appropriate height for its placement. The sink must be installed in advance to avoid mistakes with the chosen location. Most often, the shower is not located at too high a height, as it is used not only for intimate hygiene procedures, but also for filling various containers with water or cleaning the toilet. The most suitable height, according to experts and user reviews, is 80–85 cm from the floor level.
If the toilet has a bathtub or sink, the hygienic shower can be connected to their faucet. This will make installation much easier. However, in this case, you will need to change the existing faucet to one that will have 3 outlets: a tap, a shower and a connection to a water pipe.
When connecting a hygienic shower to a sink or bathtub faucet, when the lever is opened, the water flow will be directed to the center of the sink through the spout and into the shower pipe, which will be held in place by the shut-off valve. As soon as the button on the shower head is pressed, water will begin to flow out of the shower, stopping flowing into the sink spout.
It is better if the mixer for a hygienic shower has a built-in cartridge. It happens that water supply devices fail. If the mixer has a cartridge, it can be replaced with a new one, thereby simplifying repairs.
To install the mixer you should:
- Collect all parts of the device.
- Attach the mixer in place.
- Connect the flexible hose.
- Install the watering can.
- Screw on the holder for the watering can.
- Check the design for functionality.
When purchasing a faucet for a hygienic shower, you should correctly calculate its dimensions. After all, it will be very disappointing if the dimensions of the mixer do not fit into the required size. It is worth ensuring that the installation is at a reasonable height.
What material should we choose?
To make a hygienic shower, special materials are used that are intended for plumbing and have undergone appropriate processing and certification.
There are many shower options and the price depends on them: brass is cheaper, steel is more expensive
Thus, budget faucet models are made of brass, while more expensive ones are made of stainless steel. The surface of the product is subsequently coated with chrome. The hose is made of flexible plastic and braided with metal. To make a watering can, high-quality plastic is used with paint or metal applied to the surface.
To avoid buying a cheap fake instead of a quality product, check the documentation and available product certificates.
Installation sequence
The operating principle of a hygienic shower mixer. 1. Mixer. 2. Hose connection. 3. Watering can with shut-off valve.
Before installing a hygienic shower in the toilet, understand the equipment included with the device. During the installation process you will need the following devices:
- The watering can is the main element of the design. The size and shape of the device does not matter much (for many manufacturers they are almost identical). The main difference usually lies in the design. An equally important point is the ability to regulate the water supply. There are various options available here, ranging from a thin but powerful jet to a stream like a classic shower.
- A mixer is a device with which the temperature of water is regulated. There are several options here - a thermostat or a lever model. In the first case, the temperature is set only once, after which the system automatically adjusts the desired mode.
- A hose is a device that provides water supply and has a length of up to 2 meters. Give preference to products made of rubber or polymer materials. The presence of a protective outer layer of silumin or plastic with metal elements is highly desirable. Budget devices come with plastic hoses, but they quickly break down.
- Accessories. This includes elements for fixing and connecting a hygienic shower, namely adapters, mounts for a watering can and others. For greater reliability, these components should be made of brass or bronze. Budget models use silumin stainless steel, but its disadvantage is its short service life and the risk of breakdown if the load increases.
Related article: How to open a toilet cistern with a button
Now let's start installing a hygienic shower in the toilet. The connection diagram is as follows:
Connection diagram for a hygienic shower.
Decide on the device model. Select the point where the thermostat (mixer) with a clamp for the watering can will be attached. The average installation height is 80 cm from the floor.
Prepare the grooves using a hammer drill. Connect cold and hot water pipes. Connect the pipes to the cold water and hot water system (before doing this, do not forget to turn off the water supply).
Seal the grooves with mortar, and you can begin finishing the walls (laying tiles, applying paint, and so on).
The water supply and concealed faucet are hidden in the grooves.
Install a mixer or thermostat on the hot and cold water outlets. To avoid leaks, tighten the nuts thoroughly. Act without fanaticism so as not to accidentally damage the integrity of the thread.
Scheme for connecting a hygienic shower to a water supply.
Make a mark where the watering can will be placed. Check again that the distance between the axles is correct. Using an anchor, secure the mount for the watering can (if it acts as an individual device and not part of the mixer).
Screw a tube with a watering can to the outlet part of the thermostat or mixer (the device is attached using a threaded connection).
Open the water supply taps and make sure the joints are tight. Select the appropriate temperature and close the mixer.
Important. The faucet must be kept closed when the shower is not in use, otherwise the shut-off valve will quickly wear out. But the main problem is that an open mixer on a hygienic shower (or bidet) leads to the formation of a “mixture” - hot water in the system pushes out cold water (or vice versa), which can cause problems throughout the house.
Drain the water to rinse all hoses and pipes, after which the device is available for use.
A hygienic shower for a toilet is a convenient and useful device that is increasingly finding use in the homes and apartments of millions of people. This is not surprising, because this method of treatment is more comfortable and safe for a person’s intimate parts.
Instructions for installing a hygienic shower
Wall installation. In this case, you will have to build a niche in the wall or make a special box in which you can hide tubes and hoses. To do this job well, it is better to hire a specialist. But if you decide to do this yourself, follow the instructions:
- Carefully review the documentation supplied with the product. The basic principles of installation are often described there.
- Consider where the hygienic shower will be installed.
- Install the plumbing system.
- Determine at what point the shower hose will be led out.
- Route the connecting hoses to this point.
- Using a hammer drill, create a niche in the wall, then lay pipes and bends into it.
- According to the product instructions, install the shower mixer in the niche.
- After performing a test run, check if water is leaking anywhere.
- If everything is in order, make cosmetic repairs to the wall.
- Install all external shower parts and connect them together according to the instructions.
There are models of hygienic showers with a mounting box. Installation of such models is much simpler.
Installation of the bidet cover:
- Shut off the water supply to the tank and then empty it.
- Disconnect the water supply pipe from the tank.
- Remove the toilet lid.
- Install and secure the new cover according to the instructions.
- Attach a tee and a filter to the tank hose.
- Connect the filter and lid using a special tube.
- Check the device's serviceability by testing it.
Installation on a sink is the easiest option
You just need to replace the faucet and connect the water supply. It is also worth installing a holder for a watering can next to the toilet.
Installation of a hygienic shower with a thermostat on the wall
A hygienic shower with a wall-mounted thermostat can be located on any side of the toilet at the discretion of the owners, regardless of the location of the handle for the watering can and the mixer itself. To provide additional comfort, you can attach towel hooks and a liquid soap dispenser next to the watering can.
A built-in hygienic shower (hidden thermostat) must be installed according to a certain scheme.
- Hollow out a niche of the required size in the wall.
- Supply water.
- Install the wiring.
- Install a mixer.
To install an external hygienic shower, no additional repair work or global remodeling of the room is required. Installation of such devices can be done at any time.
Review of manufacturers
When purchasing a hygienic shower, you should trust only trusted manufacturers, the quality of their products has been confirmed by users. Here are the most popular ones:
Grohe is a German manufacturer offering sanitary ware with good quality indicators. But the price of such products is above average. The line of this brand includes many products with extraordinary design solutions.
Grohe
Oras is a Finnish brand that is in great demand among customers due to the time-tested quality of its products.
Oras
Kludi is another German company, known not only in Germany, but also in Europe. The models of this brand are high-tech and high quality.
Kludi
Nicolazzi is an Italian manufacturer with a long history in the plumbing market. The products of this company are distinguished by their unique design.
Nicolazzi
A hygienic toilet shower is a truly multifunctional and practical device that will make your life more comfortable. When choosing a specific model, focus on the size and configuration of your bathroom and financial capabilities.
If you choose a high-quality model and use it correctly, this device will serve you for many years.
Installation of a universal bidet attachment on a toilet
Installation of a hygienic shower in a small toilet is carried out directly on the toilet. This equipment is called a compact bidet attachment for universal use, so installation can be carried out on any type of toilet.
The main elements of a hygienic shower installed directly on the toilet. This device fits any toilet and is therefore considered universal.
The bidet attachment should include:
- mixer with supply for cold and hot water;
- shower hose;
- hygienic watering can;
- special mounting plate.
The bidet attachment can be installed under the toilet lid on the left or right side (depending on the location of the toilet in the bathroom and the availability of free space around the plumbing fixture). After installation work is completed, water is supplied to the mixer using flexible hoses.
A toilet with a hygienic shower installed under the lid allows you to do without installing a bidet. After all, the compact device attaches to any type of toilet within a couple of hours
Instructions for assembling this bidet attachment:
- Install the gasket on the mixer (A) and attach the pipe (D) to it.
- Attach the faucet to the mounting plate (B), and then secure the parts with a clamp with a gasket (D) and a clamping nut (E).
- Next, proceed to attach the water hoses (K) to the mixer.
- Attach the adapter nut (G) to the pipe.
- Screw the watering can hose (I) into the adapter nut.
- Connect the watering can itself (3) to the free end of the hose.
- Remove the protection made from double-sided tape from the mounting plate elements.
- Install the mounting plate to the place where the toilet lid is attached.
- Then proceed to install the toilet lid itself, placing it on top of the mounting plate.
- Secure the toilet lid.
Related article: How to fix a cistern
The main stages of assembling a hygienic shower or bidet attachment. The plumber needs only ten steps to secure the plate with the hygienic shower under the toilet lid
Types of hygienic shower
The popularity of devices has led to the appearance of various models on the market:
- toilet with built-in nozzle;
- cover model with a built-in hygienic shower;
- wall-mounted device with hidden installation;
- open hose mounted on the wall;
- installation for a toilet with a hygienic shower.
Hygienic shower on the toilet lid
The big advantage of this device is its mobility, the ability to easily install it on any toilet and then dismantle it. The lid is equipped with retractable nozzles, which are made of antiseptic materials. The toilet with built-in hygienic shower is controlled manually or using an electronic panel located on the side. Improved models are equipped with a special remote control. Many have a heating system and several water supply modes.
The most modern models can additionally be equipped with a hairdryer function and even a heated seat. The more bells and whistles, the more expensive a hygienic toilet shower costs. The device does not require complex installation; it is placed in place of a regular seat and connected to the water. It is important to take measurements before purchasing, because such a seat will not fit every faience element.
Hygienic shower with toilet mounting
The device is popularly called a bidet. Water is supplied through special nozzles located on a fitting under the rim of the bowl, or built into its side. The direction of the jet can be adjusted or not, the power and temperature are adjusted by the mixer. A toilet with a hygienic shower with a bidet function can be mechanical or electronic.
The first option is configured manually and has a small number of functions. The latter are endowed with different capabilities: adjusting the water temperature, moving and turning the fitting, subsequent drying and much more. Water can be supplied to the built-in mixer from the water supply or heated in an internal flow-through heater.
Hygienic shower on the wall
The most budget option resembles a regular shower in its external design. Installation is carried out near the toilet. The temperature is adjusted on the mixer, and the hose is supplied after pressing the lever-button. Such a hygienic shower for a toilet with a mixer can be installed in the following ways:
- Built-in
. At a high cost, it has its admirers among those who care about the aesthetic appearance of the room. Installation requires dismantling the wall or installing an additional cabinet. - Open
. The cost is lower than the previous option. They are cut into pipe lines, and the holder is installed on the wall. The device requires the addition of a thermostat, which sets the temperature of the water entering the watering can. - On the sink
. The mixer is replaced with a model that has an outlet for connecting a flexible hose with a watering can. This hygienic toilet shower is used when the sink is located close to the toilet so that you can reach the tap while sitting on the earthenware product.
Where to buy a faucet with a hygienic shower for the toilet: the most famous manufacturers
Hygienic shower with built-in single-lever mixer.
There are many different installation schemes for this device - the choice of the required option depends on the design of the purchased product and the location of its installation.
One of the options for connecting pipes to the mixer and to the water outlet of the shower hose, when they have to be separated in order to increase the comfort of use.
Installation work includes several stages:
- First of all, it is necessary to visually determine the installation location of the hygienic shower system. The optimal height of the mixer from the floor surface is 700÷800 mm. When installing the shower head into the bracket, the hose must not touch the floor. In addition, if the toilet is located close to the wall, so as not to accidentally hit the faucet or holder with your elbow, it is recommended to mount them not above the toilet, but on the wall before it.
The best way to find a convenient place to place such equipment is to do some kind of fitting. To do this, you will have to sit down on the toilet and, holding out your hand, determine where it will be comfortable to reach the mixer lever and shower head. This area is worth marking on the wall.
- Next, it is necessary to determine the shortest path for the passage of water pipes from the main lines to the installation site of the mixer, fixing it on the wall with a pencil. If the hose is connected to a holder that has a separate structure, then a line is also drawn from the mixer to its installation location.
- To the location of the mixer and the water outlet, grooves are cut in which the cold and hot water supply pipes will be placed.
Hidden supply line made of polypropylene pipes from the water supply to the mixer, and from the mixer to the shower water outlet.
- If you plan to mount a faucet model built into the wall, then a socket (a recess of the required dimensions) is cut for it, into which it is recommended to embed a plastic box. It will protect the wall from moisture, and the mixer from construction dust and finishing mortar getting into it.
- To supply water to the mixer, it is recommended to use polypropylene pipes, the connection of which is carried out by welding. Docking in this way will eliminate the possibility of leaks. And given that the pipes remain hidden in the wall, this is a very important point.
- Plastic pipes are connected to the mixer using special straight or angled threaded fittings.
- So, hot and cold water pipes are connected to the mixer. Then a common pipe is drawn from it to the installation site of the water outlet, to which the shower hose will be connected. Through this section of the pipe, water of the required temperature, prepared by the mixer, will flow into the hose.
- After the installation of the pipes is completed, they are covered with plaster mortar flush with the main surface of the wall. Only the body of the mixer cartridge with the control rod and the water outlet remain outside for subsequent installation of the shower itself.
- The wall is lined with decorative material, in which holes are cut for the parts of the system protruding outward.
- Next, a decorative cap is installed on the protruding thread of the mixer head, which will cover the unsightly appearance of the opening remaining in the decoration, which, as a rule, does not have completely straight edges. Then the adjustment lever is installed. The water outlet is also “tied” in a similar way. As already mentioned, it can be combined with the bracket or placed separately. The simplest option is when it is combined with a mixer.
- The last step is to assemble the hose with the shower head, and then connect it to the corresponding pipe of the water outlet, bracket or mixer - depending on the model.
With external installation mixers everything is much simpler. Their installation is practically no different from the installation of the most ordinary mixer. That is, eccentrics are screwed into the water sockets, the interaxial distance and horizontal position are precisely positioned. And then, using union nuts and installing gaskets, the mixer itself is simply screwed on.
Screwing in the eccentrics and their correct positioning is perhaps the most difficult operation when installing external wall-mounted faucets. All subsequent actions are simple and clear.
In conclusion, it can be noted that precise instructions accompanied by an installation diagram for a specific model of hygienic shower are usually included with the product. So you will have to get the main information from there - there may be some nuances.
There are many types of hygienic systems, which differ in location and some design features. At the same time, some of the modern models practically do not require constant settings. There are even those that have electronic push-button or touch controls. Now let's try to understand what the pros and cons of this or that type are, what differences they have in control, and how to determine the one that is needed for a particular user.
Read more: How to find water for a well, a review of the best methods for finding water on site
There are such devices, but the hygiene here is a little “lame”
Buying a bidet toilet is not a problem for anyone now. Difficulties arise with its placement, especially in small bathrooms. It is for this reason that most people prefer a bidet attachment. This term combines many types of devices, which means that any installation of this type can be called so.
To begin with, it makes sense to understand how such devices are connected to the water supply and what is required for this.
The most convenient connection method is mounting on a sink. True, its significant drawback is that such a connection is only possible if there is a combined bathroom. If this is the layout, then usually the sink is quite close to the toilet. This arrangement allows you not to use an additional mixer, but simply replace the already installed one. The only thing left to do is to install the holder for the hygienic watering can where it is convenient.
The watering can comes out automatically here, and the result is a full-fledged bidet
This system is interesting because it allows you to pre-set a comfortable water temperature directly in the sink. Afterwards, when you need to use the shower, all you have to do is press the feed button on the shower head. And switching the direction of water supply from the hygienic shower head to the sink is done by turning a special lever, similar to a regular faucet and shower in the bathroom. Similar systems can also be found in some housewives’ kitchens – where a watering can is used for washing and rinsing dishes.
Such toilets have recently become increasingly popular. Often they are already equipped with a bidet function. If not, installing a separate watering can with a hose here will be quite simple.
All communications of such a toilet are usually hidden behind a false wall. It is this that will allow hot and cold water supply to be supplied to the mixer, which is mounted on its outer side, along with the holder. The result is a rather aesthetic and comfortable design. Naturally, for such an installation, the home craftsman will need to buy a hatch for the plumbing cabinet in the toilet, which will allow for the necessary periodic or emergency maintenance.
Keeping your toilet and sink clean becomes quite easy.
Connecting a wall-mounted hygienic shower for a bidet with a mixer to hot and cold water supply can cause minor difficulties. Most often, for this purpose, walls are grooved and pipes are laid in them. After finishing, in this case, there is not even a hint that they are there.
This is no longer a lid, but practically a pilot’s seat
The simplest models of such devices are produced by many companies. A kind of watering can is built into the toilet seat, the water supply from which is turned on using a button on the side. But the Japanese surpassed everyone, as always in such equipment. Their modern “miracle caps” can truly be called such.
Power is supplied and turned off to the electronics using the remote control. The lid itself rises the moment a person appears in the toilet. After the mandrel, when you press the button from below, the watering can “moves out”, which performs all hygienic procedures. Next, a stream of warm air is supplied to carry out drying.
Among other things, such a lid automatically measures body weight and temperature, adjusting the water heating for it to the most comfortable level. Of course, the cost of such equipment is not small - it can reach $1,500.
The thermostat is a fairly convenient device for such equipment. It allows you to avoid setting the hearth temperature and installing the mixer. You just need to set the required comfortable water temperature, and the thermostat will independently maintain it in the specified range. Installation of such equipment is usually carried out using the hidden installation method.
This location is not very convenient - it stretches far
A bidet watering can is essentially an ordinary hygienic shower, the only difference being that it is installed directly on the toilet in the flush area. Installation is carried out using special mounts that come with the equipment. In this case, you can place a mixer or a thermostat on the wall, which will regulate the temperature of the supplied water. If a thermostat is used, a pressure supply button is mounted next to it or in any other easily accessible place.
Hygienic shower rating
To get maximum enjoyment from use, you need to know which models are popular. Among all the variety offered on the market, the following options are distinguished:
- Lemark Solo LM7165C
. Model with brass body. The mixer is connected to a watering can holder. - Hygienic shower for toilet Grohe Euphoria 27369000
. Equipped with the Speedclean system against lime deposits. - Rossinka Silvermix X25-51
. Inexpensive model that is mounted on a vertical surface. The eyeliner can be hidden in a niche. - Grohe BauCurve 123072
. The mixer and holder are separated. Suitable for installation on the toilet wall. - Rossinka Silvermix Y25-52
. Single lever model. Convenient water temperature adjustment.