Having your own playhouse is the dream of many children. Children often gather in large groups and try to build huts, running into the forest in the hope of building a shelter in a large tree. But, as a rule, something not strong comes out of this venture or nothing at all comes out. But loving parents have the opportunity to help their child and make his little dream come true by building a tree house - strong, beautiful and incredibly cozy. Let's figure out what needs to be taken into account during construction so that the house becomes a real gift for children.
House around a tree
Choosing a tree for the house
Choosing the right tree for our construction is more important than making a good foundation for an above-ground house. Here the price of a mistake is cracks not only in the walls, but also in the ribs.
We choose a tree that is at least 30-35 years old, from species with a slow or medium growth rate.
Why is it important? The fact is that even “slow” species, such as oak or cedar, grow especially intensively at the age of up to 30 years, adding about 30 cm per year. This means that you need to expect that, having built a house at a height of 3 meters, in ten it will take six years to climb.
I recommend: Is it possible to make the walls in the cellar from aceid sheets
Having chosen a pine or maple with an average growth rate of 0.5-0.6 m/year, we will be at this height within five years.
The best species are oak, cedar, cedar pine, and ash. Hornbeam, maple, pine, spruce and fir are good. For fruits, pear will go (especially wild ones with flexible, durable wood). Mulberry (mulberry) will also do, but when the berries ripen, you will have to dress in clothes that you don’t mind. Linden only if there is nothing else.
You can build a house on a single tree, if it is reliable enough
A categorical no to willow, poplar, aspen, birch, chestnut, and also, regardless of the species, to trees with large hollows and a lot of dry branches. Even trees that are strong but have tree fungi growing on them are not suitable.
We need a trunk with a diameter of 30 cm and above. It’s not bad if there are a couple or three developed branches at the height of the proposed construction; it’s very good to have a powerful fork. It’s great if you can place the building on two or three trees growing nearby.
What types of tree houses are there?
Here are some more tree house options. The imagination and skill of the builders is amazing.
Geodesic Lodge, USA
0
Source:
The architecture firm O2 Treehouse, owned by Dustin Fider, specializes in building treehouses. The creators of a wooden geodesic tree house in Southern California were inspired by the work of architect Buckminster Fuller. All the luxury of this structure lies not in its amenities, but in the very presence of this miracle in the courtyard of the house.
How to choose a tree for your home, selection criteria
The first priority when building a treehouse is choosing the tree. After all, the safety of children depends on it.
For construction, it is better to use a plant with strong wood and strong growing roots. Suitable oak, apple, maple or ash.
It is better not to use spruce, pine and other conifers. They are not particularly strong. And fruit trees often have weak branches. Before construction begins, the tree is carefully inspected. It should be healthy, the branches are intact, without any damage to the bark.
We remove all dry and weak branches (you can use a saw). We putty the cuts and paint them.
We also pay attention to the age of the tree. Too young will not be suitable because they are not strong enough, and old ones are susceptible to disease.
The roots must be firmly held underground - this will create reliable support. The root system coming out may look impressive, but it is definitely not safe.
If you decide to build a small house (about 2 by 2 meters), then the trunk should be at least 30 cm in diameter, and the branches for the base should be up to 25 cm.
Choosing a tree for the base of the house
The choice of tree for placing a children's house on it must be taken very seriously.
The success of the entire project will depend on this. If the tree cannot withstand the load, not only the reputation of the builder may suffer, but also the children playing in the house. Trees with hard wood and a good root system, such as oak, maple, ash, and apple, are suitable for building a children's house.
Attention! Coniferous trees are not suitable for building a house because of their instability, and most fruit trees have fragile branches.
The main criteria for choosing a tree for a children's house:
- The tree must be healthy , without damage to the bark and dry branches;
Advice! Branches with damage or sudden changes in diameter must be removed, and the cuts must be puttied and painted over.
- The age of the tree should be average for the selected species, since young trees may not withstand the load, and too old ones are susceptible to disease;
- The roots of the tree should not reach the surface of the earth; well-branched and deep roots are a reliable foundation for a tree house;
- For a small house measuring 2x2 m, the tree trunk should be at least 30 cm in diameter, and the branches on which the base of the house will be attached should be from 20 to 25 cm in diameter.
Important! To build a house, it is better to choose a tree growing in dense clay soil. Sandy soils reduce the stability of trees.
How to ensure the safety of children, what needs to be taken into account during the construction stages of a tree house
To ensure that children are protected from all kinds of threats, the following rules must be observed during construction:
- The house does not exceed 2 and a half meters in height;
- The materials are durable;
- For fastenings we use bolts;
- Walls and railings are required (some people just make a high floor and a canopy - this is unsafe!). The height of the fences is up to 90 cm.
- The ladder is stable.
- The surface around the house is as soft as possible. There should be no stones, protruding pins, etc. lying around the house.
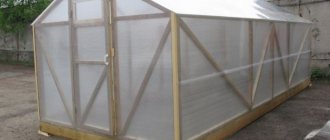
You should not chase cheap materials and improvised means. If you build, but a high-quality and durable structure.
Step-by-step instructions for building a tree house
Before you make a treehouse with your own hands, you should make sure you have the necessary materials and tools. Depending on the design of the house, you will need:
- boards (new or used);
- washers and screws (galvanized);
- nails, screws;
- tarpaulin;
- roofing material;
- hammer, drill, saw, jigsaw, adjustable wrench;
- roulette;
- stepladder or regular ladder, etc.
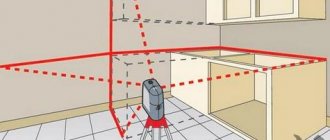
Tree house drawing, design and plan
After choosing the tree on which the house will be, you need to start drawing. The Internet is replete with all sorts of options, the main thing is to choose the one that will match the tree. It is often necessary to make changes to the drawing to suit the actual data of the plant.
An important detail when constructing a drawing is the design of support for the house. Children will certainly run around inside; chairs, tables, etc. will probably be placed in the house. You need to be sure that it will not collapse under pressure.
The main ways to support a structure:
- Pillars. Several strong pillars are buried under the tree, which will hold the house and will not damage the plant.
- We attach the house with bolts to the tree.
- Suspension. This method is less secure. You need to choose a reliable tree, the cables must be very strong.
Another important task is to think about the entrance and exit from the house. It is not recommended to attach wooden boards like a ladder to the trunk; it is unsafe. It is better to purchase a normal, durable ladder (perhaps from a bunk bed) and secure it. A rope version of the ladder is also suitable. It is better that it is small, it is more reliable.
Tree house for children. High-tech shelter
This luxury tree house was built by the English company Blue Forest, which has been creating luxury huts since 2003. This hut was made in Greece, and the idea was to create a structure for children, similar to a James Bond-style hideout.
The house not only looks beautiful, but is also packed with technology, from a plasma TV and a state-of-the-art audio system to a biometric security system that includes fingerprint verification and color cameras for night-time surveillance. The house also has a bathroom and a small kitchen.
Materials and tools for work
Construction will require a large number of tools and materials.
Here is a list of what you need:
- Fasteners: bolts, nuts, nails, screws, etc.
- Plane.
- Saw.
- Ladder.
- Overalls, gloves, glasses.
- Hammer.
- Construction level.
- Screwdriver.
- Drill.
- Fraser.
- Paint and brushes, etc.
Depending on the planned drawing, we select materials. If you decide to build a small wooden house, then an approximate list of materials will be as follows:
- several boards (4 meters long, 25 cm wide and 5 cm thick);
- 6 three-meter boards;
- plywood (for railings) and other boards;
- 4-meter timber - 3 pieces (thickness - 5 cm, width - 15 cm);
- metal plates for fastening beams (8 units);
- cable;
- canvas fabric and other materials depending on the drawing.
This is just a standard set of raw materials necessary for construction. Finishing, painting, possibly painting walls, etc. are not taken into account. After the main building is completed, a whole range of all kinds of decorative decorations and extensions opens up.
Tree house (video). Nescafe Treehouse
This amazing house was designed by Takashi Kobayashi, one of Japan's most famous tree house creators. He decided to create this structure after an advertising company asked him to do it for a Nescafe advertisement on Japanese television. Resembling a nest, this hut has a height of 3.6 m and a diameter of 2.7 m. To get into it you need to use a spiral staircase. The price of the house is $38,000 and it is located in the city of Kamishihoro, being his property, since the Nestlé company donated it to the residents of the city.
Tree house diagram for attaching the base of the house
The house is built on a tree that runs through it.
The house is supported by separate beams.
House on suspended ropes
Tree house (photo). The Mirror Cube
This hotel, located in Sweden, is possibly the world's smallest tree house. This glass cube measures 4x4x4 m, and its outer shell is made entirely of mirror glass. This structure allows you to reflect the environment and, as a result, create the effect of invisibility.
To prevent birds flying by from hitting the mirror cube, the structure was covered with an infrared film, invisible to people, which reflects light waves visible to birds. And inside there is a bed and a bathroom.
DIY tree house for children, step-by-step construction
An option is proposed to build a house for children on stilts, using a tree with V-shaped branches.
the first stage of attaching the base
After selecting a suitable tree and clearing the ground around its perimeter, you can begin the actual construction of the house.
To do this, mark the points on the branch where the support beams will connect. Next, we designate where the platform will be attached (simply measure the distance between the points).
After this, you need to draw perpendiculars from all corners of the base to the ground and dig in pegs.
Then we dig holes for the beams so that on each side of the platform of the house there is an indentation of about 1/3 of the length of the floor. The depth of the pit must be at least 1.4 meters and up to 30 cm in diameter.
First pour sand (10 cm) onto the bottom and the same amount of crushed stone on top.
We place the beams in the pits and level them, and make reinforcements from wooden struts. The main thing is that the piles stand exactly vertical. And the tree trunk, by the way, can be used as one of the supports, it will look beautiful and take less time.
The pits with beams are ready - fill them with cement. After drying, remove the auxiliary elements (spacers).
the second stage is laying the floor
To properly lay the floor, you need to take into account the structure of the tree - the position of the branches. Before attaching the floor to the resulting structure at a height, we lay it out on the ground. We lay the boards next to each other and draw holes for the branches (we make them larger for the bark and if the tree grows).
When laying the boards on the frame of the house, you need to make a distance between them of about 2 cm so that the water flows down. To secure the floor we use nails and screws.
third stage construction of the house frame
If only beams without a tree trunk are used to support the house, then first we make a box from timber (pre-cut to the required length). The main bars of the box need to be attached to the perimeter of its lower part. Carefully align the elements.
Now we attach both ends of the box to the inside of the posts with bolts up to 20 cm.
The harness should be reinforced with metal plates at the corners.
Inside the box we nail a few more beams (in parallel) 30 cm apart.
We reinforce the frame from below with boards - one on each side of the tree. It is better to strengthen the connections with metal plates.
fourth stage of house wall cladding
We install the walls on the frame of the house. You can use timber, attaching it with bolts at each corner. Next, we directly cover the walls with plywood or boards, and don’t forget to make windows.
fifth stage roof construction structure
Let's imagine one of the options for constructing a roof.
sixth stage roof installation
One of the roof options is a roof in the form of a canopy. We are looking for two strong branches on both sides of the house (at a height of about 2 meters). We attach hooks to them and pull a fairly powerful cord or rope. We throw the tarpaulin over the rope and fasten it to the corners of the house.
You can cut holes in the roof for large branches if you can’t make a roof otherwise. But you can’t attach the roof tightly to the branches (they grow). Therefore, it is worth leaving cutouts around the holes.
seventh stage installation of stairs
A house requires a reliable staircase, which in no case should dangerously wobble, much less crack. Make sure that it is not slippery, with reliable handrails. Rope is a good option, especially if the children are not too small. But it is better to attach an additional main, more convenient one to it.
eighth stage housewarming
As soon as the construction is completed, you can have a housewarming party. You can decorate the inside of the house with drawings, soft toys and pillows, and paint the outside of the building. It all depends on the imagination and preferences of the owners of the building.
Types of tree houses
It is pointless to try to classify the structure being described by its appearance. Yes, most often it’s just a house. However, if you are a skilled carpenter, it will not be difficult for you to give the structure absolutely any look. From a medieval castle to a space station, from a princess's palace to a dragon's cave. So we will divide all the options for the described structure into three groups, based on the method of attaching them to the tree trunk.
Suspended structure
The simplest to implement, this design, unfortunately, is the least reliable. And, accordingly, the least safe. The entire structure essentially hangs on branches, attached by cables, chains or ropes.
There are several dangers here. Cables or ropes may burst, fastenings may rust and collapse over time, branches may not hold up, especially if your child decides to bring a lot of friends to his shelter. Of course, the probability of all this is small, but it cannot be ignored. In addition, as the tree and, accordingly, its branches grow, the structure may become distorted.
You can avoid injury in the event of a cable break if you build such a house low above the ground. However, for a child it will be much less interesting than a secret headquarters hidden in a tree crown.
Platform design
Ideally, a children's house of the described design should be built on a tree with powerful branches. They will become the supports for the lower ceiling of the structure - that is, that very platform. Additional support is provided, if necessary, by oblique beams that rest against the tree trunk.
If the tree is not branchy, or the branches are too high, there is a second option. Using self-tapping anchors, you can fix the lower floor of the described structure. Then ensure stability and reliability using the same oblique beams.
Construction on stilts
This option can be considered optimal in terms of reliability, as well as the complete absence of harm to the tree. In the described case, the children's tree house is simply adjacent to its trunk. The trunk can even pass through the middle of the structure, but it will stand on stilts. Their number and thickness are calculated in accordance with the overall dimensions of the structure, as well as the height to which you want to raise it.
As we have already said, if you choose the described option, you will not harm the tree around which you will build a children's house. And, of course, the tree will not harm the structure, as can happen in the case of a suspended structure and platform, where drying and breaking a branch can destroy the entire house. The only thing worth considering when cutting a hole in the ceiling for a tree trunk is that over the years it becomes thicker.
Staircase options for a tree house
Selecting the type of support
There are 3 main options for attaching a treehouse without damaging the tree itself. We won’t consider options in which nails are driven into wood - we won’t, right?
- Installation of a house on poles. This type of fastening does not harm the tree. The house is placed on supports, like on stilts - pillars dug into the ground. It is advisable to make a foundation under such pillars, or fill the holes with incompressible soil - sand or gravel.
Tree house on supports
- Bolted ties. Wooden boards or blocks are secured with metal ties around the wood. This fastening is not entirely beneficial for the tree, but it is less destructive compared to driving nails into it.
Support for a tree house made of boards and metal ties
- Hanging method. The tree house can be hung by ropes or chains from strong branches. This method requires a fairly balanced design solution and calculations and will not be discussed in detail here. But the project described here can be adapted to this method of fastening. This method of fastening can hardly be used if the house is quite heavy. Mainly used for fastening round, oval houses or fastening something like tents or hammocks.
Round house hanging on a tree
For the struts that will attach the deck to the tree trunk, we will prepare a beam with a cross-section of 60*100 mm. Such a beam can be attached to the ties described in the second fastening method.
I recommend: Wallpapering walls with your own hands, and how to glue wallpaper correctly
We connect the deck frame slats “into the wood floor.” That is, to mate the parts, we cut them halfway and remove the wood so that by folding the parts, we get a smooth product. We adjust the connections, sign the joints with the same letters on the parts at the point of their connection.
We select metal corners and overlays for all corners and junctions of the internal frame beams with the perimeter beams.
All metal parts must be galvanized or painted twice with oil compounds.
If at the attachment point we have branches that will pass through the deck, we find the places where they intersect with the deck covering using a plumb line, lowering it from the place of the branch where we drew the white line onto the structure laid below.
After the deck is assembled, we number its parts and sketch out what we got. We put numbering on this sketch.
Preservation of a tree house in winter
With the onset of cold weather, the house will probably cease to be popular with children. Therefore, it should be closed until spring. But first, put things in complete order, check whether excess moisture is getting inside, whether the roof will leak or bend. Afterwards, we close the windows and doors tightly and take out all the things that could be damaged by the cold.
A tree house is a great gift for children. Together with him you give happy moments that will never be forgotten. Every child dreams of his own personal corner, in which he will feel like a real master. It is important to follow all safety rules during construction, use high-quality materials, then the house will delight the children for a long time.
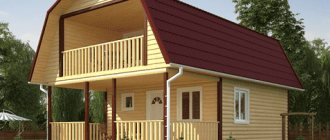
Exterior and interior design of children's treehouse
After finishing construction, you can decorate the children's house to suit every taste. For this you will need available materials, bright colors, household utensils, skillful hands and imagination. You can do this together with your children.
If the house was made of wood, it can easily be turned into a fairy-tale mansion. Carved frames for windows and doors are made of plywood. The roof ridge can be decorated with a wooden cockerel or a funny-shaped weather vane, and the roof slopes and walls can be painted with bright colors.
Inside the house you can place benches and chairs made of wood, made by yourself, hang “antique” dishes on the table .
For lovers of sea travel, the house can be designed in the shape of a ship under sail. Attach a rope ladder, place a steering wheel inside, and hang gear and rigging on the walls.
By covering the house with camouflage netting, you can set up a hunting lodge. Robinson's hut, St. John's wort's secret home, Rapunzel's tower - there are many options. In general, it is better to entrust the choice of design and decoration of a children's house to its inhabitants. Wild imagination and favorite characters will give you ideas for creativity.
Ladder. Construction of the house frame
We continue to work on the construction of the entrance staircase. We manufacture and install it immediately according to a permanent pattern from a 40 mm board. In the lower part we rest on painted steel corners driven into the ground.
The main difficulties are behind us. Now we have a platform on which we can safely work and a reliable ladder along which it is convenient to convey materials upstairs.
Let's start building the frame of the house. For the main posts (in the corners, for fastening windows and doors), we take 60x80 mm timber. The long side of the section of the beam is placed perpendicular to the plane of the wall. Thus, we get the thickness of the walls of the house 80 mm plus cladding. For auxiliary braces and tightening, a 50x60 beam is sufficient.
I recommend: Question: What kind of siding is good, durable, not expensive, where to buy, how much does it cost?
We assemble the frame of the house, as well as the frame of the deck, cutting the parts “into the wood floor”, connecting the joints with self-tapping screws.