Buy or make it yourself?
If making something with your own hands is not for you, then of course it is better to purchase a factory-made version; ready-made greenhouses are widely available for sale.
But any gardener will tell you that, as a rule, store-bought greenhouses do not have sufficient strength. The structure needs to be further strengthened and installed on a good foundation.
When making a greenhouse with his own hands, each owner tries to provide it with an increased safety margin.
Greenhouse care
The finished building must be properly looked after:
- First of all, do not wash the polycarbonate surface with abrasive and chemical substances, because they destroy it.
- Repair damage in a timely manner and monitor the integrity of the structure.
- In winter, when precipitation occurs, it is necessary to regularly clear the roof of snow, using only soft brushes that prevent mechanical damage to the polycarbonate.
A designer greenhouse can decorate any farmstead and even a cottage town due to the presence of a large number of interesting ideas for its design. You just have to show your imagination and follow some rules.
Selecting a location
The area where you plan to place the greenhouse should be well lit. The best greenhouses are those that are located on hills.
At the very least, melt and rainwater should not flow into this place. If the groundwater is too high, it is necessary to equip a drainage system.
A clay area is not suitable for a greenhouse, as the water will stagnate here. Ideally, sandy soil.
You can make a cushion of sand and gravel yourself by digging a pit using a shovel and filling it with a sand and gravel layer, followed by adding fertile soil.
How to make a small greenhouse with your own hands
To get an early harvest or protect it from bad weather, you can build a small polycarbonate greenhouse with your own hands. Before starting work, it is important to choose a suitable location for the greenhouse, consider design features, the possibility of ventilation, lighting, and also calculate the number of sections and arcs.
Site selection and preparation
When choosing a location for a future polycarbonate greenhouse, consider:
- location relative to cardinal directions;
- soil features;
- landscape, presence of buildings and trees nearby.
The best options for installing a greenhouse in relation to the cardinal directions:
- from east to west;
- from North to South.
The first option is considered more preferable. It allows you to provide planting with light throughout the day.
The soil should be smooth and dry, without clay content. Ideally, the site of the future structure is filled with sand gravel, a sand cushion, and then a fertile layer.
Advice! If groundwater lies at a depth of less than 1.2 m, you should consider installing a drainage system.
The greenhouse should not be positioned in such a way that shadows from nearby buildings or trees fall on it, or falling leaves, ice or snow.
Required materials and tools
When installing a small polycarbonate greenhouse, in addition to the main material, you will need:
- materials for waterproofing;
- frame: metal profile, wooden beams, slats or plastic pipes;
- construction corners;
- anchor type bolts and self-tapping screws.
The following tools will be useful during installation:
- drill;
- electric jigsaw;
- hammer;
- screwdriver;
- knife;
- building level.
Drawing and calculations
To assemble a small greenhouse with your own hands, you start by drawing up a drawing and making calculations. You can use standard solutions or develop your own project, look at the best projects of small greenhouses with your own hands.
To do this, it is important to do the following:
- Calculate the base of the structure, select the material and dimensions of the frame and covering.
- Calculate the loads that the structure will have to withstand.
- Consider at what distance the beds will be located.
- Calculate how many windows, sashes, doors need to be installed.
All these parameters are reflected in the drawing. During the calculations, some nuances should be taken into account. For example, the dimensions of a greenhouse with a wooden frame often turn out to be larger than planned, since the wood swells from moisture. In this regard, polyvinyl chloride pipes are considered a more practical material. The higher cost is offset by a long service life. When planning a small seasonal greenhouse, the design should be such that it can be easily and quickly disassembled.
Assembly and installation of a small greenhouse
To assemble a small greenhouse for a summer residence, several stages go through:
- Leveling the area, removing the grass layer.
- When making a concrete foundation - creating formwork according to the size of the greenhouse, making a row of brickwork or a base of boards.
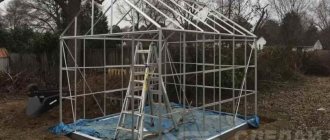
- Assembling the frame: cutting pipes of the required parameters, connecting them taking into account the pitch between the arches, attaching the pipes to the profile.
- Installation of the door frame, fastening it to concrete with anchor bolts or self-tapping screws to wood.
- Sheathing with polycarbonate sheets - fastening at the ends, cutting out vents, doors and installing fittings.
To properly install polycarbonate sheets, you need to remove the protective coating from them, then take one sheet and carefully place it on the greenhouse frame and level it. Extend the polycarbonate to the end by 2-3 cm, level it again, and then attach it to the arc using roofing screws.
Next, take galvanized metal tape, lay it on top of the polycarbonate sheet, and secure it with self-tapping screws, starting from the second arc. They begin laying the next sheet, install the remaining part of the metal tape, and make the constriction. The tape is pulled from the first sheet from the second arc, the last one is pulled off the overlapping sheets.
You can see how to quickly assemble a small greenhouse with a removable roof with your own hands in the video:
Cellular polycarbonate
For a greenhouse, cellular polycarbonate is usually used. Almost 90 percent of light passes through it, and its resistance to impacts is many times higher than that of glass.
Polycarbonate also differs in its density. The optimal option for the material used to sheathe stationary greenhouses is 800 g/m2.
Types of small greenhouses
Before buying or making a small greenhouse with your own hands, it is important to decide on the shape of the structure. You should be guided by how convenient it is to care for plants - while outside or inside the greenhouse. There are many models. The most common designs are arched, tents and extensions.
Arched greenhouse
Small greenhouses in the form of an arch can often be found in summer cottages, despite the fact that such a design is not considered suitable for all plants. For example, tomatoes can be planted in them in the center of the room, away from the walls. However, arched greenhouses have many advantages:
- To install the structure, it is not necessary to install a foundation.
- Thanks to the sloping roof, snow does not accumulate on it during the winter months.
- The greenhouse is easy to move from one place to another.
- You can assemble and install a small arched polycarbonate greenhouse yourself.
- The frame and cladding of such a structure are light and durable, which significantly extends its service life.
- In an arched greenhouse, you can additionally install automatic watering and heating systems and add sections.
- The cost of construction is relatively low.
Among the disadvantages of arched greenhouses, summer residents most often note the inability to operate small collapsible greenhouses in winter and move stationary structures to a new location.
Tent
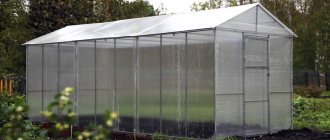
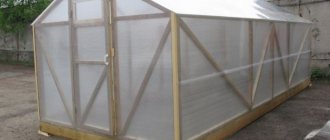
Tent-shaped structures are externally similar to classic houses. They have gable roofs. This form is suitable for the manufacture of collapsible and stationary greenhouses. Tent-shaped buildings are suitable for growing cucumbers. In addition, they are often chosen for the construction of large-area greenhouses. However, small polycarbonate greenhouses have a number of advantages:
- light is well distributed in them;
- the area that can be used for planting plants is maximum;
- convenient to grow tall crops;
- Installing ventilation and heating systems is easy.
Tent-shaped polycarbonate buildings have several disadvantages:
- the areas of connection between the walls and roof slopes are not always airtight, they must be constantly monitored;
- The consumption of materials for the construction of a greenhouse-tent is large, this affects the overall cost of the greenhouse.
Extension
Greenhouses in the form of extensions are lean-to wall structures. Their main feature is the presence of a common wall with a house or other structure. It serves as good support and protection from wind, snow, and heavy rain. Due to these differences, extensions are often used all year round. They can be heated and used to grow vegetables, berries or flowers.
Advice! The foundation extends the life of a small greenhouse, allowing it to be used for more than one year. It can be shallowly buried strip or timber.
Owners of greenhouse extensions note the following advantages:
- the wall shared with the house always remains warm;
- you can install a heating system and connect it to a centralized one;
- due to its design features, the extension occupies a minimal area;
- the consumption of materials when installing a greenhouse is minimal, which reduces its cost;
- The building is located in close proximity to the house, so you don’t have to go far to care for the plants.
Single-pitch wall structures also have disadvantages:
- High humidity is maintained inside the greenhouse, due to which the wall shared with the house is destroyed;
- even if the site has become unsuitable for growing plants, the greenhouse cannot be moved, a new one has to be installed;
- In winter, snow and ice can fall from the roof of the house onto the greenhouse, which can damage the top covering of the extension.
Foundation arrangement
To arrange it, the perimeter is marked with pegs. Then a trench is dug to the depth of the spade bayonet. A 10-15 cm layer of sand is poured onto the bottom and compacted. Wooden formwork is installed along the edges of the trench to a height of 15-25 cm.
To make the foundation stronger, a frame made of reinforcement with a diameter of 8 mm is placed in the trench. At this stage, it is recommended to immediately lay the mortgages to which the lower frame elements will be welded.
After all these preparatory materials, the formwork is filled with concrete, which is leveled. You can begin further work after 3-4 days, when the concrete has hardened.
Frame
There are different types of greenhouses for summer cottages. The main structure is usually made of wooden beams, aluminum or metal profiles, and pipes.
The most common material is a profile pipe 40×20 or 20×20 mm. It is important to know that it is sold in lengths of 3, 6, 4, 12 m, etc.
To avoid waste, the greenhouse design must be adjusted to these dimensions, taking into account the size of the polycarbonate sheet.
What is the beauty of a greenhouse?
When constructing a greenhouse in the garden, you really want not to disturb the beauty of nature and harmoniously fit the building into the landscape. In this situation, it is considered ideal to use design ideas that combine functionality, originality and unusual appearance.
The main features of such a building include:
- neatly executed design;
- consists of high-quality and modern building materials;
- clean, decorated building;
- visually fits into the environment.
Such a room is beautiful both outside and inside; it can have transparent glass walls, a non-standard roof and everything your imagination can do.
Assembly instructions
Using a grinder, the profile is cut into dimensions corresponding to the drawing. The support pillars are welded around the perimeter to the mortgages. The standard step is 1 meter.
Next, the top trim is installed. To ensure the stability of the resulting structure, spacers and cross members are welded. When installing a gable roof, two pipes are cut in the middle with a grinder and bent at the cut point at the required angle.
The ridge is cut to the required length and the pipes are welded into a single structure. The door frame is also made of pipe and installed on hinges at one of the ends. On the other hand, a window is made in the same way.
The main structural elements can be welded on a flat surface, after which the finished trusses are installed on the foundation.
Types of greenhouses
Greenhouses are classified according to the following criteria:
- Location : wall-mounted, stationary, portable, combined.
- Configuration : size, shape, execution style.
- Finish : pattern, color of polycarbonate or frame.
Let's take a closer look at some of them.
English
This type is built on a foundation, which prevents crops from freezing. The next distinguishing feature is the coating material - glass. It is often replaced with polycarbonate, but this reduces the uniqueness of the structure.
In addition, a glass building has higher transparency, and accordingly, the harvest will ripen faster. A greenhouse is built with a gable, fairly steep roof, the beams are placed at an angle of 45°. This feature is designed to prevent snow from accumulating on the roof, which could damage the structure.
- To summarize the above, we can highlight a number of advantages of English greenhouses:
- High light transmittance. Plants do not feel a lack of lighting, which eliminates the installation of additional light sources.
- Good heat retention.
- Durability thanks to a strong frame and the presence of a foundation.
Disadvantages include high installation costs.
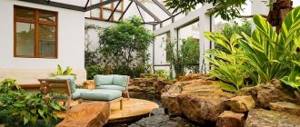
An English-style greenhouse will be an excellent addition to the landscape design of your site; it can be used as a greenhouse, and due to the height of the structure, a winter garden.
Arc-shaped roof
For this shape you need to have a pipe bender. With its help, the pipes are bent to the desired radius. There is another way, but it is more labor-intensive.
If you have experience, you can make cuts on the pipe with a grinder and bend them along them. The resulting semicircles are welded to the frame.
Finally, the metal structure must be primed and painted.
If you first look on the Internet at photos of polycarbonate greenhouses, you can get some ideas for yourself.
Polycarbonate coating - properties and comparison with other materials
The modern greenhouse market offers three coating materials with their own advantages and disadvantages: glass, film and cellular polycarbonate.
Glass
An option that for many years had no analogues in gardening. The main advantages are good throughput, the longest service life without changing the initial characteristics.
Disadvantages include the heaviness of the material and increased thermal conductivity, as well as fragility, which makes it difficult to process and transport. The light that passes through the glass is not scattered, so it only hits the upper part of the plants, while the lower part remains in the shade - this is a clear disadvantage for tall crops.
Film
Durable stabilized polyethylene with a thickness of 150-200 microns, which had records in popularity for the manufacture of greenhouses in the 60s of the last century. Today it is still in use, but has undergone significant changes. Now on the market there are two- or three-layer materials with the addition of reinforcing mesh to increase mechanical strength. It is possible to add a coating to prevent condensation.
The film is in demand due to its low price, light weight and easy installation. At the same time, the coating is short-lived (the maximum warranty period is only 5 years) and is easily damaged, and even a strong gust of wind can cause damage.
Polycarbonate
Cellular polycarbonate is the optimal analogue of glass and film, which has their advantages and at the same time is practically free of disadvantages.
The material is plastic transparent two- or three-layer panels. The layers are connected by internal stiffeners, between which there is air. This air layer gives the material excellent thermal insulation properties, and the ribs increase its strength. Polycarbonate is 200 times more durable than glass and, unlike the thickest film, can withstand extreme winds and snow on the roof.
The impact resistance of 6 mm thick cellular polycarbonate is 2.1 J. This indicator means that the material will not be damaged even if hit by a hailstone with a diameter of 2 cm during a hurricane.
Moreover, plastic is much safer than even tempered glass - if damaged, it does not shatter into fragments that can cause you to cut yourself.
A polycarbonate greenhouse does not need to be disassembled for the cold season - it can easily withstand frosts down to -45 degrees. In addition to temperature, the material is chemically resistant, so there is no need to worry if garden chemicals get on its surface.
When purchasing covering material, pay attention to the presence of a light-stabilizing layer. When laying it should be outside. Polycarbonate without such a coating is only suitable for internal partitions!
But the main advantage of polycarbonate for greenhouse use is, of course, the best thermal insulation ability of all the materials described. The air accumulated between the stiffening ribs contributes greatly to this.
Various types of polycarbonate on a cut
Moreover, the level of transmission of rays from the extreme zone of the spectrum by the material is minimal. Simply put, the heat emitted by plants stays inside. Low thermal conductivity can lead to overheating of plants in hot weather, so the structures are equipped with windows for ventilation.
For a summer greenhouse, polycarbonate with a thickness of 4 mm will be sufficient; for winter growing vegetables, material with a thickness of 8-10 mm will be suitable.
Unlike glass, polycarbonate scatters the sun's rays, reflecting them from all its surfaces at different angles (stiffeners, top and bottom layer).
At the same time, assembling a polycarbonate greenhouse is quite simple, since the panels are easy to cut and drill without significant loss of material.
Installation of polycarbonate
The installation of greenhouses is completed by covering them with polycarbonate sheets.
The sheets are attached to the metal using self-tapping screws with a drill using special thermal washers. They hold the sheet well and do not damage the material. Neoprene is used for the seal.
When tightening screws, the screwdriver must be set to minimum tightening. The washer should tighten slightly, pressing the polycarbonate to the frame.
Polycarbonate sheets can be placed both vertically and horizontally. They are joined with an overlap of 8-15 cm. The pitch between the screws is 25-30 centimeters.
Photos of polycarbonate greenhouses
1+
